+
Shop the Grill Dads
Double Brined

Thanksgiving Turkey

The perfect holiday turkey!

Cook Time 2-4 Hours

Prep Time 60 Minutes

Down Time 1-2 Days

Turkey

  • 1 x 12-14 12-14 pound whole turkey (not brined or injected with salt water solution)
  • Kosher salt
  • Black pepper
  • Garlic powder
  • Fresh poultry herbs (2-3 bunches from the grocery store)
  • ½ cup butter (clarified or ghee is even better)

Brine

  • 1 liter of water
  • 30 grams of Kosher salt
  • 5-6 cloves of garlic, smashed
  • 10 grams of brown sugar
  • 1 tablespoon of whole black pepper
  • 1 x bay leaf

Gravy

  • 6 cups chicken stock
  • 2T salted butter
  • ¼ cup AP flour
  • ½ cup dry white wine
  • Giblets and juices from the turkey

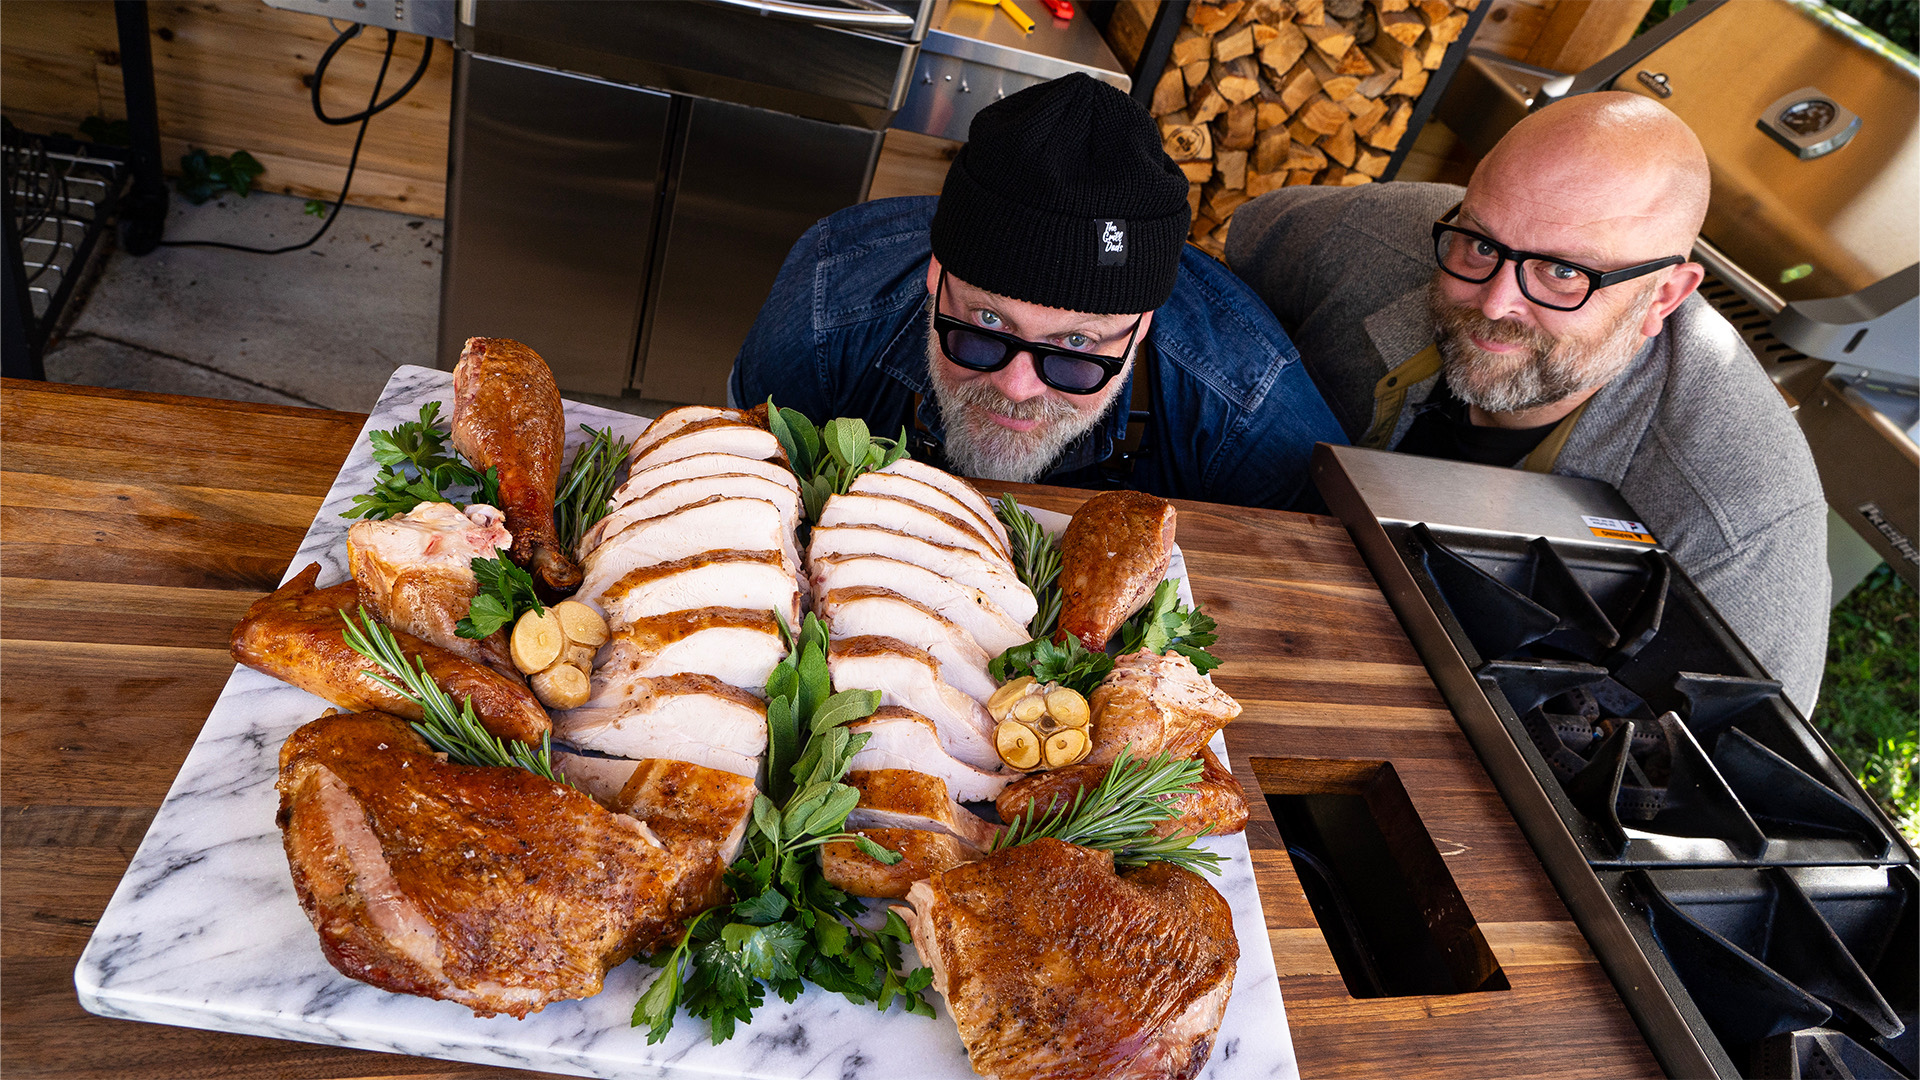
Wondering if you should wet brine or dry brine your Thanksgiving Turkey? The answer is… both!


This recipe will end dry, boring turkey. The outside is dry-brined for crispy, salty skin, and the inside is injected with a wet brine for juicy, perfectly seasoned meat.


This turkey is easy but requires some planning. If you are reading this on Thursday morning, you’ve already lost Thanksgiving! Okay, you haven’t lost; just don’t overcook the bird.


Here is a calendar to help you get organized:

  • Saturday: Remove your turkey from the freezer and place in the fridge.
  • Tuesday afternoon: Spatchcock and season the bird, make your turkey stock.
  • Wednesday: Drink Grill’n Time Cocktails.
  • Thursday: Get the turkey out of the fridge early and make some magic on that smoker.

Make the brine:

In a large pot, bring half of the water to a boil. Add the salt and sugar, stirring until they dissolve completely. Add the garlic cloves, peppercorns, and bay leaves to the hot water. Let it simmer for 5 minutes to infuse the flavors. Remove the pot from the heat, strain, and add the remaining water to cool the brine to room temperature. It is easiest to make this the day before.


Spatchcock the turkey:


Spatchcocking involves removing the backbone to flatten the bird, allowing for even faster cooking. 


To prep the turkey, remove the giblets, trim excess skin, pat it dry, and place it breast-side down on a stable cutting board. Save all the trim and parts for the stock! Cut along one side of the backbone using sharp kitchen shears from the tail to the neck. Repeat on the other side to remove the backbone entirely (save it for stock!). Flip the turkey over so it’s breast-side up. Press firmly on the breastbone until you hear a crack and the bird flattens. Tuck the wing tips under the breasts to prevent them from burning during cooking.


Season the turkey:


Move the turkey to a sheet pan with an inserted rack. Starting with the inside of the turkey facing up, liberally season with kosher salt and a nice thin sprinkling of pepper and garlic powder. DO NOT season under the skin for this recipe. Flip the bird skin-side up and repeat.


Using a meat injector, inject the meat with our brine. To do this, Insert the needle into the thickest parts of the turkey (breasts, thighs, and drumsticks). Press the plunger down slowly as you withdraw the needle to distribute the saline solution evenly within the muscle. Aim to inject 1-2 ounces of solution per pound of turkey, evenly spread across different areas.


The holes in the skin from the needle will help excess fat and steam escape from under the skin during cooking, making it crisp!


Put the turkey in the fridge, skin side up, for 24-36 hours.


Make the stock:


One advantage of prepping the turkey early is having ingredients for stock. Make this the day before! 


Rub the giblets, trimmed skin, and spine in olive oil and roast until light golden brown. Add them, along with the juices from the sheet tray, to a pot large enough to hold the stock and giblets. Add the stock and simmer until the stock has reduced slightly, about twenty minutes. Strain and allow it to cool. Store the story in the fridge.


Cook the turkey:


We are going to cook the turkey in two stages!


Preheat your smoker to 250º and remove your turkey 90 minutes before cooking. 


Place the herbs under the rack in the tray and place your turkey in the smoker, rotating the tray every 30 minutes until it reaches 153º – 155º in the breast and 165º in the thigh. The turkey will keep cooking. Poultry food safety is a factor of time and temperature. According to USDA, if the turkey gets to 155º intern for 47 seconds, it will be safe to eat. If you cook it to 165º on the smoker, it will hit 175º and be dry. If you have health concerns or love overcooked turkey, leave it on until the breast hits 165º and make extra gravy.


Allow the turkey to rest for 30-45 minutes (longer is okay; just tent it). Pour the pan juices into a bowl and reserve them for the gravy. 


Set up for searing the skin. We used our pizza oven at 600º, but you can also use a grill at 600º or a broiler with the turkey on a lower rack. Heat your butter and brush the skin. Place the turkey in the grill or oven until the skin gets golden brown, 3-5 minutes (watch it closely; turkey skin will go from golden to burnt and sad quickly).


It is ready to slice and serve!


Make the gravy:


Add the juice from the turkey sheet tray and the butter in a large skillet. Bring it to a simmer on medium-high heat. Reduce the heat and add the flour, cooking until it becomes light brown (2-3 minutes). Add the wine to deglaze the pan, then add the stock. Stir vigorously with a whisk to incorporate the rue and stock fully. Bring it to a simmer and stir until it thickens, about 3-5 minutes. Store in a thermos and keep it warm until you are ready to serve!

Comments:


Be The First To Comment:

Your email address will not be published. Required fields are marked *

Recipe Rating


Double Brined Thanksgiving Turkey The perfect holiday turkey!

Author Mark & Fey
Course Dinner
Cuisine Holiday
Keyword Brine, gravy, Poultry, smoked, smoked salmon, Thanksgiving, Turkey
Prep Time 1 hour
Cook Time 2 minutes
Servings 1

Ingredients

Turkey

  • 1 x 12-14 12-14 pound whole turkey not brined or injected with salt water solution
  • Kosher salt
  • Black pepper
  • Garlic powder
  • Fresh poultry herbs 2-3 bunches from the grocery store
  • ½ cup butter clarified or ghee is even better

Brine

  • 1 liter of water
  • 30 grams of Kosher salt
  • 5-6 cloves of garlic smashed
  • 10 grams of brown sugar
  • 1 tablespoon of whole black pepper
  • 1 x bay leaf

Gravy

  • 6 cups chicken stock
  • 2 T salted butter
  • ¼ cup AP flour
  • ½ cup dry white wine
  • Giblets and juices from the turkey

Instructions

  • Wondering if you should wet brine or dry brine your Thanksgiving Turkey? The answer is… both!
  • This recipe will end dry, boring turkey. The outside is dry-brined for crispy, salty skin, and the inside is injected with a wet brine for juicy, perfectly seasoned meat.
  • This turkey is easy but requires some planning. If you are reading this on Thursday morning, you’ve already lost Thanksgiving! Okay, you haven’t lost; just don’t overcook the bird.
  • Here is a calendar to help you get organized: Saturday: Remove your turkey from the freezer and place in the fridge. Tuesday afternoon: Spatchcock and season the bird, make your turkey stock. Wednesday: Drink Grill’n Time Cocktails. Thursday: Get the turkey out of the fridge early and make some magic on that smoker. Make the brine: In a large pot, bring half of the water to a boil. Add the salt and sugar, stirring until they dissolve completely. Add the garlic cloves, peppercorns, and bay leaves to the hot water. Let it simmer for 5 minutes to infuse the flavors. Remove the pot from the heat, strain, and add the remaining water to cool the brine to room temperature. It is easiest to make this the day before.
  • Spatchcock the turkey:
  • Spatchcocking involves removing the backbone to flatten the bird, allowing for even faster cooking. 
  • To prep the turkey, remove the giblets, trim excess skin, pat it dry, and place it breast-side down on a stable cutting board. Save all the trim and parts for the stock! Cut along one side of the backbone using sharp kitchen shears from the tail to the neck. Repeat on the other side to remove the backbone entirely (save it for stock!). Flip the turkey over so it’s breast-side up. Press firmly on the breastbone until you hear a crack and the bird flattens. Tuck the wing tips under the breasts to prevent them from burning during cooking.
  • Season the turkey:
  • Move the turkey to a sheet pan with an inserted rack. Starting with the inside of the turkey facing up, liberally season with kosher salt and a nice thin sprinkling of pepper and garlic powder. DO NOT season under the skin for this recipe. Flip the bird skin-side up and repeat.
  • Using a meat injector, inject the meat with our brine. To do this, Insert the needle into the thickest parts of the turkey (breasts, thighs, and drumsticks). Press the plunger down slowly as you withdraw the needle to distribute the saline solution evenly within the muscle. Aim to inject 1-2 ounces of solution per pound of turkey, evenly spread across different areas.
  • The holes in the skin from the needle will help excess fat and steam escape from under the skin during cooking, making it crisp!
  • Put the turkey in the fridge, skin side up, for 24-36 hours.
  • Make the stock:
  • One advantage of prepping the turkey early is having ingredients for stock. Make this the day before! 
  • Rub the giblets, trimmed skin, and spine in olive oil and roast until light golden brown. Add them, along with the juices from the sheet tray, to a pot large enough to hold the stock and giblets. Add the stock and simmer until the stock has reduced slightly, about twenty minutes. Strain and allow it to cool. Store the story in the fridge.
  • Cook the turkey:
  • We are going to cook the turkey in two stages!
  • Preheat your smoker to 250º and remove your turkey 90 minutes before cooking. 
  • Place the herbs under the rack in the tray and place your turkey in the smoker, rotating the tray every 30 minutes until it reaches 153º – 155º in the breast and 165º in the thigh. The turkey will keep cooking. Poultry food safety is a factor of time and temperature. According to USDA, if the turkey gets to 155º intern for 47 seconds, it will be safe to eat. If you cook it to 165º on the smoker, it will hit 175º and be dry. If you have health concerns or love overcooked turkey, leave it on until the breast hits 165º and make extra gravy.
  • Allow the turkey to rest for 30-45 minutes (longer is okay; just tent it). Pour the pan juices into a bowl and reserve them for the gravy. 
  • Set up for searing the skin. We used our pizza oven at 600º, but you can also use a grill at 600º or a broiler with the turkey on a lower rack. Heat your butter and brush the skin. Place the turkey in the grill or oven until the skin gets golden brown, 3-5 minutes (watch it closely; turkey skin will go from golden to burnt and sad quickly).
  • It is ready to slice and serve!
  • Make the gravy:
  • Add the juice from the turkey sheet tray and the butter in a large skillet. Bring it to a simmer on medium-high heat. Reduce the heat and add the flour, cooking until it becomes light brown (2-3 minutes). Add the wine to deglaze the pan, then add the stock. Stir vigorously with a whisk to incorporate the rue and stock fully. Bring it to a simmer and stir until it thickens, about 3-5 minutes. Store in a thermos and keep it warm until you are ready to serve!
Video

Double Brined

Shake Shack Smash Burger

The perfect holiday turkey!

Cook Time 2-4 Hours

Prep Time 60 Minutes

Down Time 1-2 Days

Turkey

  • 1 x 12-14 12-14 pound whole turkey (not brined or injected with salt water solution)
  • Kosher salt
  • Black pepper
  • Garlic powder
  • Fresh poultry herbs (2-3 bunches from the grocery store)
  • ½ cup butter (clarified or ghee is even better)

Brine

  • 1 liter of water
  • 30 grams of Kosher salt
  • 5-6 cloves of garlic, smashed
  • 10 grams of brown sugar
  • 1 tablespoon of whole black pepper
  • 1 x bay leaf

Gravy

  • 6 cups chicken stock
  • 2T salted butter
  • ¼ cup AP flour
  • ½ cup dry white wine
  • Giblets and juices from the turkey

Wondering if you should wet brine or dry brine your Thanksgiving Turkey? The answer is… both!


This recipe will end dry, boring turkey. The outside is dry-brined for crispy, salty skin, and the inside is injected with a wet brine for juicy, perfectly seasoned meat.


This turkey is easy but requires some planning. If you are reading this on Thursday morning, you’ve already lost Thanksgiving! Okay, you haven’t lost; just don’t overcook the bird.


Here is a calendar to help you get organized:

  • Saturday: Remove your turkey from the freezer and place in the fridge.
  • Tuesday afternoon: Spatchcock and season the bird, make your turkey stock.
  • Wednesday: Drink Grill’n Time Cocktails.
  • Thursday: Get the turkey out of the fridge early and make some magic on that smoker.

Make the brine:

In a large pot, bring half of the water to a boil. Add the salt and sugar, stirring until they dissolve completely. Add the garlic cloves, peppercorns, and bay leaves to the hot water. Let it simmer for 5 minutes to infuse the flavors. Remove the pot from the heat, strain, and add the remaining water to cool the brine to room temperature. It is easiest to make this the day before.


Spatchcock the turkey:


Spatchcocking involves removing the backbone to flatten the bird, allowing for even faster cooking. 


To prep the turkey, remove the giblets, trim excess skin, pat it dry, and place it breast-side down on a stable cutting board. Save all the trim and parts for the stock! Cut along one side of the backbone using sharp kitchen shears from the tail to the neck. Repeat on the other side to remove the backbone entirely (save it for stock!). Flip the turkey over so it’s breast-side up. Press firmly on the breastbone until you hear a crack and the bird flattens. Tuck the wing tips under the breasts to prevent them from burning during cooking.


Season the turkey:


Move the turkey to a sheet pan with an inserted rack. Starting with the inside of the turkey facing up, liberally season with kosher salt and a nice thin sprinkling of pepper and garlic powder. DO NOT season under the skin for this recipe. Flip the bird skin-side up and repeat.


Using a meat injector, inject the meat with our brine. To do this, Insert the needle into the thickest parts of the turkey (breasts, thighs, and drumsticks). Press the plunger down slowly as you withdraw the needle to distribute the saline solution evenly within the muscle. Aim to inject 1-2 ounces of solution per pound of turkey, evenly spread across different areas.


The holes in the skin from the needle will help excess fat and steam escape from under the skin during cooking, making it crisp!


Put the turkey in the fridge, skin side up, for 24-36 hours.


Make the stock:


One advantage of prepping the turkey early is having ingredients for stock. Make this the day before! 


Rub the giblets, trimmed skin, and spine in olive oil and roast until light golden brown. Add them, along with the juices from the sheet tray, to a pot large enough to hold the stock and giblets. Add the stock and simmer until the stock has reduced slightly, about twenty minutes. Strain and allow it to cool. Store the story in the fridge.


Cook the turkey:


We are going to cook the turkey in two stages!


Preheat your smoker to 250º and remove your turkey 90 minutes before cooking. 


Place the herbs under the rack in the tray and place your turkey in the smoker, rotating the tray every 30 minutes until it reaches 153º – 155º in the breast and 165º in the thigh. The turkey will keep cooking. Poultry food safety is a factor of time and temperature. According to USDA, if the turkey gets to 155º intern for 47 seconds, it will be safe to eat. If you cook it to 165º on the smoker, it will hit 175º and be dry. If you have health concerns or love overcooked turkey, leave it on until the breast hits 165º and make extra gravy.


Allow the turkey to rest for 30-45 minutes (longer is okay; just tent it). Pour the pan juices into a bowl and reserve them for the gravy. 


Set up for searing the skin. We used our pizza oven at 600º, but you can also use a grill at 600º or a broiler with the turkey on a lower rack. Heat your butter and brush the skin. Place the turkey in the grill or oven until the skin gets golden brown, 3-5 minutes (watch it closely; turkey skin will go from golden to burnt and sad quickly).


It is ready to slice and serve!


Make the gravy:


Add the juice from the turkey sheet tray and the butter in a large skillet. Bring it to a simmer on medium-high heat. Reduce the heat and add the flour, cooking until it becomes light brown (2-3 minutes). Add the wine to deglaze the pan, then add the stock. Stir vigorously with a whisk to incorporate the rue and stock fully. Bring it to a simmer and stir until it thickens, about 3-5 minutes. Store in a thermos and keep it warm until you are ready to serve!
Comments:


Be The First To Comment:

Your email address will not be published. Required fields are marked *

Recipe Rating


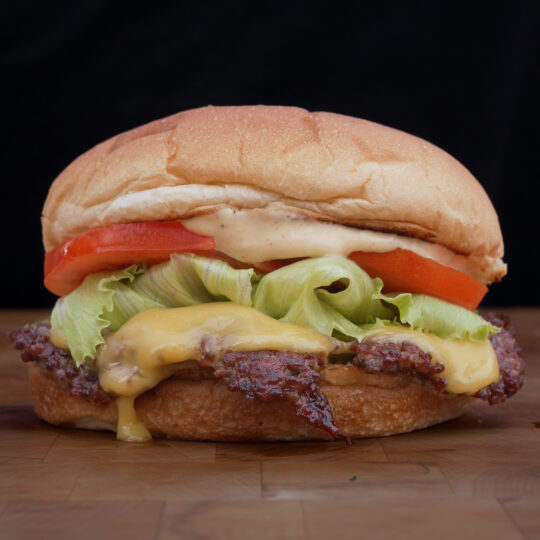
Shake Shack Smash Burger

Author Mark & Fey
Course Dinner, Lunch, Tailgate
Keyword Beef, Shake Shack, smash burger
Cook Time 30 minutes
Servings 8

Ingredients

For the Shake Shack Secret Sauce

  • 2 tbsp dill pickle finely diced
  • 1/2 cup mayo
  • 1 tbsp ketchup
  • 1 tbsp yellow mustard
  • 1/4 tsp paprika
  • 1/4 tsp garlic powder
  • 1/8 tsp cayenne pepper
  • Kosher salt for seasoning
  • Black pepper for seasoning
  • 8 oz beef sirloin trimmed of gristle and cut into 1 inch cubes
  • 4 oz well marbled beef chuck trimmed of gristle and cut into 1 inch cubes
  • 4 oz boneless short rib trimmed of gristle and cut into 1 inch cubes
  • 1 oz dry aged beef fat cut into 1/4 inch cubes
  • 8 burger buns
  • 8 slices American cheese
  • 1 small head of iceberg lettuce
  • 16 center-cut slices ripe plum tomato
  • 4 tbsp unsalted butter
  • Kosher salt for seasoning
  • Black pepper for seasoning

Instructions

  • Start by adding all your beef cuts onto a big sheet tray and mix them well. Transfer to the freezer for 30 minutes. Make your Shake Shack secret sauce while the beef cools.
  • In a medium bowl, add in all of your secret sauce ingredients and mix well until everything is evenly combined. Season with Kosher salt and black pepper to taste. Set aside.
  • Take the beef out of the freezer and grind it onto another sheet tray. Once all your beef is ground, make 8 (2 oz) loose balls and set aside.
  • Set a griddle or a flat top to medium high heat. Add your burgers and using a sheet of parchment paper and a burger press, smash your burgers real thin. Cook for 3 to 4 minutes or until the juices start to pool. Flip your burgers and add a slice of American cheese on top of each burger. Cook for a few more minutes until the cheese begins to melt. Remove from the heat and get ready to build your burgers.
  • Smear your burger buns with butter and toast them on the griddle or flat top for a couple minutes or until golden brown. Remove from the heat and set aside.
  • Start building your burgers. Onto a bottom bun, add your burger patty with cheese, lettuce, 2 slices of tomato and the top bun smeared with your Shake Shack secret sauce.
Double Brined

Sticky Togarashi Wings with a Yuzu Gimlet

The perfect holiday turkey!

Cook Time 2-4 Hours

Prep Time 60 Minutes

Down Time 1-2 Days

Turkey

  • 1 x 12-14 12-14 pound whole turkey (not brined or injected with salt water solution)
  • Kosher salt
  • Black pepper
  • Garlic powder
  • Fresh poultry herbs (2-3 bunches from the grocery store)
  • ½ cup butter (clarified or ghee is even better)

Brine

  • 1 liter of water
  • 30 grams of Kosher salt
  • 5-6 cloves of garlic, smashed
  • 10 grams of brown sugar
  • 1 tablespoon of whole black pepper
  • 1 x bay leaf

Gravy

  • 6 cups chicken stock
  • 2T salted butter
  • ¼ cup AP flour
  • ½ cup dry white wine
  • Giblets and juices from the turkey

Wondering if you should wet brine or dry brine your Thanksgiving Turkey? The answer is… both!


This recipe will end dry, boring turkey. The outside is dry-brined for crispy, salty skin, and the inside is injected with a wet brine for juicy, perfectly seasoned meat.


This turkey is easy but requires some planning. If you are reading this on Thursday morning, you’ve already lost Thanksgiving! Okay, you haven’t lost; just don’t overcook the bird.


Here is a calendar to help you get organized:

  • Saturday: Remove your turkey from the freezer and place in the fridge.
  • Tuesday afternoon: Spatchcock and season the bird, make your turkey stock.
  • Wednesday: Drink Grill’n Time Cocktails.
  • Thursday: Get the turkey out of the fridge early and make some magic on that smoker.

Make the brine:

In a large pot, bring half of the water to a boil. Add the salt and sugar, stirring until they dissolve completely. Add the garlic cloves, peppercorns, and bay leaves to the hot water. Let it simmer for 5 minutes to infuse the flavors. Remove the pot from the heat, strain, and add the remaining water to cool the brine to room temperature. It is easiest to make this the day before.


Spatchcock the turkey:


Spatchcocking involves removing the backbone to flatten the bird, allowing for even faster cooking. 


To prep the turkey, remove the giblets, trim excess skin, pat it dry, and place it breast-side down on a stable cutting board. Save all the trim and parts for the stock! Cut along one side of the backbone using sharp kitchen shears from the tail to the neck. Repeat on the other side to remove the backbone entirely (save it for stock!). Flip the turkey over so it’s breast-side up. Press firmly on the breastbone until you hear a crack and the bird flattens. Tuck the wing tips under the breasts to prevent them from burning during cooking.


Season the turkey:


Move the turkey to a sheet pan with an inserted rack. Starting with the inside of the turkey facing up, liberally season with kosher salt and a nice thin sprinkling of pepper and garlic powder. DO NOT season under the skin for this recipe. Flip the bird skin-side up and repeat.


Using a meat injector, inject the meat with our brine. To do this, Insert the needle into the thickest parts of the turkey (breasts, thighs, and drumsticks). Press the plunger down slowly as you withdraw the needle to distribute the saline solution evenly within the muscle. Aim to inject 1-2 ounces of solution per pound of turkey, evenly spread across different areas.


The holes in the skin from the needle will help excess fat and steam escape from under the skin during cooking, making it crisp!


Put the turkey in the fridge, skin side up, for 24-36 hours.


Make the stock:


One advantage of prepping the turkey early is having ingredients for stock. Make this the day before! 


Rub the giblets, trimmed skin, and spine in olive oil and roast until light golden brown. Add them, along with the juices from the sheet tray, to a pot large enough to hold the stock and giblets. Add the stock and simmer until the stock has reduced slightly, about twenty minutes. Strain and allow it to cool. Store the story in the fridge.


Cook the turkey:


We are going to cook the turkey in two stages!


Preheat your smoker to 250º and remove your turkey 90 minutes before cooking. 


Place the herbs under the rack in the tray and place your turkey in the smoker, rotating the tray every 30 minutes until it reaches 153º – 155º in the breast and 165º in the thigh. The turkey will keep cooking. Poultry food safety is a factor of time and temperature. According to USDA, if the turkey gets to 155º intern for 47 seconds, it will be safe to eat. If you cook it to 165º on the smoker, it will hit 175º and be dry. If you have health concerns or love overcooked turkey, leave it on until the breast hits 165º and make extra gravy.


Allow the turkey to rest for 30-45 minutes (longer is okay; just tent it). Pour the pan juices into a bowl and reserve them for the gravy. 


Set up for searing the skin. We used our pizza oven at 600º, but you can also use a grill at 600º or a broiler with the turkey on a lower rack. Heat your butter and brush the skin. Place the turkey in the grill or oven until the skin gets golden brown, 3-5 minutes (watch it closely; turkey skin will go from golden to burnt and sad quickly).


It is ready to slice and serve!


Make the gravy:


Add the juice from the turkey sheet tray and the butter in a large skillet. Bring it to a simmer on medium-high heat. Reduce the heat and add the flour, cooking until it becomes light brown (2-3 minutes). Add the wine to deglaze the pan, then add the stock. Stir vigorously with a whisk to incorporate the rue and stock fully. Bring it to a simmer and stir until it thickens, about 3-5 minutes. Store in a thermos and keep it warm until you are ready to serve!
Comments:


Be The First To Comment:

Your email address will not be published. Required fields are marked *

Recipe Rating


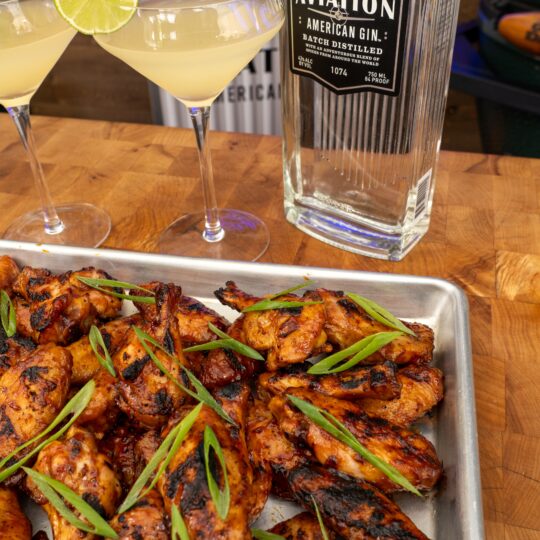
Yuzu Gimlet with Sticky Togarashi Wings

Sticky Togarashi Wings with a Yuzu Gimlet

Author Mark & Fey
Course Dinner, Lunch, Snack
Keyword Aviation American Gin, chicken wings, Japanese BBQ Sauce, Poultry
Cook Time 25 minutes
Servings 4

Ingredients

For the Yuzu Gimlet (1 Serving)

  • 1 1/2 oz Aviation American Gin
  • 1 oz simple syrup
  • 1 half lime juiced
  • 1/2 oz Yuzu juice
  • 1 slice of lime for garnishing (optional)

For the Sticky Togarashi Wings

  • 2 1/2 pounds chicken wings split into flats and drumettes
  • Kosher salt for seasoning
  • Garlic powder for seasoning
  • Black pepper for seasoning
  • 3 cloves garlic finely diced
  • 1 tbsp minced ginger
  • 1 16oz bottle of Bachan's Hot and Spicy Japanese BBQ Sauce
  • 1/4 cup rice wine vinegar
  • 1 tbsp Japanese Togarashi
  • 1 tbsp cornstarch
  • 1 1/2 tbsp water
  • Neutral oil for the pan
  • 1/4 cup finely diced scallions for garnishing (optional)

Instructions

  • For the yuzu gimlet:
  • In a cocktail shaker, add your Aviation American Gin, simple syrup, lime juice and the yuzu juice. Stir (or shake) well for 10 seconds. In a glass gimlet cup or a cup that’s not as cool, pour your drink using a strainer. Garnish with your slice of lime.
  • For the sticky togarashi wings:
  • Season your chicken wings with salt, garlic powder and black pepper on all sides.
  • Set a grill to medium indirect heat, about 375 degrees F. Grill the chicken wings directly on the grates until they reach an internal temperature of 155 degrees F, for about 25 minutes. Meanwhile, make the togarashi BBQ sauce.
  • Make your cornstarch slurry in a small bowl by combining the cornstarch and 1 1/2 tbsp of water. Stir for a couple of minutes or until evenly combined. Set aside.
  • Set a medium sauce pan to medium heat. Coat in neutral oil and add your garlic cloves and minced ginger. Stir for a couple of minutes. Add your Bachan’s Japanese BBQ Sauce and mix it in until evenly combined. Add your rice wine vinegar, togarashi, the cornstarch slurry and mix everything in until evenly combined. Continue to stir and cook for 5 more minutes or until thickened. Remove from the heat and set aside.
  • Remove the wings from the grill to a large bowl and toss with the togarashi BBQ sauce. Set the grill to medium high heat, about 450 degrees F. Return the wings to the grill over direct heat and cook for 1 to 2 minutes per side. You’re looking for a good char. Remove from the heat and set aside.
  • Serve the wings hot and garnish with scallions.
Double Brined

In-N-Out Smash Burger

The perfect holiday turkey!

Cook Time 2-4 Hours

Prep Time 60 Minutes

Down Time 1-2 Days

Turkey

  • 1 x 12-14 12-14 pound whole turkey (not brined or injected with salt water solution)
  • Kosher salt
  • Black pepper
  • Garlic powder
  • Fresh poultry herbs (2-3 bunches from the grocery store)
  • ½ cup butter (clarified or ghee is even better)

Brine

  • 1 liter of water
  • 30 grams of Kosher salt
  • 5-6 cloves of garlic, smashed
  • 10 grams of brown sugar
  • 1 tablespoon of whole black pepper
  • 1 x bay leaf

Gravy

  • 6 cups chicken stock
  • 2T salted butter
  • ¼ cup AP flour
  • ½ cup dry white wine
  • Giblets and juices from the turkey

Wondering if you should wet brine or dry brine your Thanksgiving Turkey? The answer is… both!


This recipe will end dry, boring turkey. The outside is dry-brined for crispy, salty skin, and the inside is injected with a wet brine for juicy, perfectly seasoned meat.


This turkey is easy but requires some planning. If you are reading this on Thursday morning, you’ve already lost Thanksgiving! Okay, you haven’t lost; just don’t overcook the bird.


Here is a calendar to help you get organized:

  • Saturday: Remove your turkey from the freezer and place in the fridge.
  • Tuesday afternoon: Spatchcock and season the bird, make your turkey stock.
  • Wednesday: Drink Grill’n Time Cocktails.
  • Thursday: Get the turkey out of the fridge early and make some magic on that smoker.

Make the brine:

In a large pot, bring half of the water to a boil. Add the salt and sugar, stirring until they dissolve completely. Add the garlic cloves, peppercorns, and bay leaves to the hot water. Let it simmer for 5 minutes to infuse the flavors. Remove the pot from the heat, strain, and add the remaining water to cool the brine to room temperature. It is easiest to make this the day before.


Spatchcock the turkey:


Spatchcocking involves removing the backbone to flatten the bird, allowing for even faster cooking. 


To prep the turkey, remove the giblets, trim excess skin, pat it dry, and place it breast-side down on a stable cutting board. Save all the trim and parts for the stock! Cut along one side of the backbone using sharp kitchen shears from the tail to the neck. Repeat on the other side to remove the backbone entirely (save it for stock!). Flip the turkey over so it’s breast-side up. Press firmly on the breastbone until you hear a crack and the bird flattens. Tuck the wing tips under the breasts to prevent them from burning during cooking.


Season the turkey:


Move the turkey to a sheet pan with an inserted rack. Starting with the inside of the turkey facing up, liberally season with kosher salt and a nice thin sprinkling of pepper and garlic powder. DO NOT season under the skin for this recipe. Flip the bird skin-side up and repeat.


Using a meat injector, inject the meat with our brine. To do this, Insert the needle into the thickest parts of the turkey (breasts, thighs, and drumsticks). Press the plunger down slowly as you withdraw the needle to distribute the saline solution evenly within the muscle. Aim to inject 1-2 ounces of solution per pound of turkey, evenly spread across different areas.


The holes in the skin from the needle will help excess fat and steam escape from under the skin during cooking, making it crisp!


Put the turkey in the fridge, skin side up, for 24-36 hours.


Make the stock:


One advantage of prepping the turkey early is having ingredients for stock. Make this the day before! 


Rub the giblets, trimmed skin, and spine in olive oil and roast until light golden brown. Add them, along with the juices from the sheet tray, to a pot large enough to hold the stock and giblets. Add the stock and simmer until the stock has reduced slightly, about twenty minutes. Strain and allow it to cool. Store the story in the fridge.


Cook the turkey:


We are going to cook the turkey in two stages!


Preheat your smoker to 250º and remove your turkey 90 minutes before cooking. 


Place the herbs under the rack in the tray and place your turkey in the smoker, rotating the tray every 30 minutes until it reaches 153º – 155º in the breast and 165º in the thigh. The turkey will keep cooking. Poultry food safety is a factor of time and temperature. According to USDA, if the turkey gets to 155º intern for 47 seconds, it will be safe to eat. If you cook it to 165º on the smoker, it will hit 175º and be dry. If you have health concerns or love overcooked turkey, leave it on until the breast hits 165º and make extra gravy.


Allow the turkey to rest for 30-45 minutes (longer is okay; just tent it). Pour the pan juices into a bowl and reserve them for the gravy. 


Set up for searing the skin. We used our pizza oven at 600º, but you can also use a grill at 600º or a broiler with the turkey on a lower rack. Heat your butter and brush the skin. Place the turkey in the grill or oven until the skin gets golden brown, 3-5 minutes (watch it closely; turkey skin will go from golden to burnt and sad quickly).


It is ready to slice and serve!


Make the gravy:


Add the juice from the turkey sheet tray and the butter in a large skillet. Bring it to a simmer on medium-high heat. Reduce the heat and add the flour, cooking until it becomes light brown (2-3 minutes). Add the wine to deglaze the pan, then add the stock. Stir vigorously with a whisk to incorporate the rue and stock fully. Bring it to a simmer and stir until it thickens, about 3-5 minutes. Store in a thermos and keep it warm until you are ready to serve!
Comments:


Be The First To Comment:

Your email address will not be published. Required fields are marked *

Recipe Rating


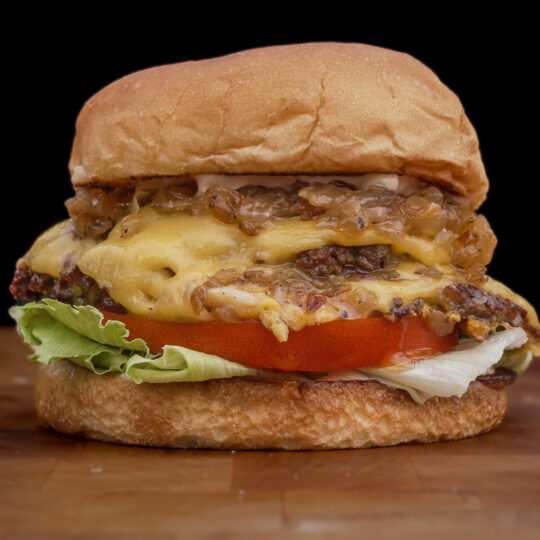
In N Out Smash Burger

In-N-Out Smash Burger

Author Mark & Fey
Course Dinner, Lunch, Tailgate
Keyword Beef, In N Out, smash burger
Cook Time 30 minutes
Servings 4

Ingredients

For the Special Sauce

  • 3 tbsp mayo
  • 1 tbsp ketchup
  • 2 tsp sweet pickle relish
  • 1/2 tsp sugar
  • 1/2 tsp distilled white vinegar
  • 16 oz fresh beef chuck with plenty of fat cut into 1 inch cubes
  • 1 large white onion finely diced
  • 4 soft hamburger buns we like Arnold
  • 4 1/4 inch thick slices ripe tomato
  • 4 leaves fresh iceberg lettuce torn to bun-sized pieces
  • 1/4 cup yellow mustard
  • 8 slices American cheese
  • Kosher salt for seasoning
  • Black pepper for seasoning

Instructions

  • French fries recipe coming soon!
  • Place your beef chuck cubes in a bowl and put them in the freezer for 20 minutes to get them ready to grind. Using a meat grinder, begin grinding your beef chuck into another bowl.
  • Build 8 (2 oz) loose balls. Place each ball on top of a small sheet of parchment paper, flatten them out using your hands and top with another sheet of parchment paper. Using a sheet tray, loosely smash each burger. Set aside.
  • To make your special sauce, combine all of the ingredients in a medium bowl and mix them until everything is evenly combined.
  • Set a skillet or flat top to medium high heat. Add your onions and season with a pinch of Kosher salt and black pepper. Cover with a cloche and cook for 6 to 8 minutes or until the onions begin to soften. Mix them around and cook for 4 to 6 more minutes or until the onions are caramelized. Remove from the heat and set aside.
  • In the same skillet or flat top, add your burger patties to cook. Add mustard on top of each patty and cook for 4 to 6 minutes until the juices begin to pool. Flip the burgers and add a slice of American cheese to each patty and top only 4 patties with your caramelized onions. Cook for a couple more minutes until the cheese begins to melt. Top the burgers with the onions with another patty with cheese, getting 4 double stacks. Remove from the heat and get ready to build your burgers.
  • Toast your buns for a couple of minutes per side until golden brown. Remove from the heat and set aside.
  • Begin building your burgers. Start by smearing your bottom buns with special sauce. Then add your lettuce, tomato, your patty double stack, more caramelized onions and place your top bun smeared with more special sauce. Enjoy!
Double Brined

Roasted Hatch Chile Pizza

The perfect holiday turkey!

Cook Time 2-4 Hours

Prep Time 60 Minutes

Down Time 1-2 Days

Turkey

  • 1 x 12-14 12-14 pound whole turkey (not brined or injected with salt water solution)
  • Kosher salt
  • Black pepper
  • Garlic powder
  • Fresh poultry herbs (2-3 bunches from the grocery store)
  • ½ cup butter (clarified or ghee is even better)

Brine

  • 1 liter of water
  • 30 grams of Kosher salt
  • 5-6 cloves of garlic, smashed
  • 10 grams of brown sugar
  • 1 tablespoon of whole black pepper
  • 1 x bay leaf

Gravy

  • 6 cups chicken stock
  • 2T salted butter
  • ¼ cup AP flour
  • ½ cup dry white wine
  • Giblets and juices from the turkey

Wondering if you should wet brine or dry brine your Thanksgiving Turkey? The answer is… both!


This recipe will end dry, boring turkey. The outside is dry-brined for crispy, salty skin, and the inside is injected with a wet brine for juicy, perfectly seasoned meat.


This turkey is easy but requires some planning. If you are reading this on Thursday morning, you’ve already lost Thanksgiving! Okay, you haven’t lost; just don’t overcook the bird.


Here is a calendar to help you get organized:

  • Saturday: Remove your turkey from the freezer and place in the fridge.
  • Tuesday afternoon: Spatchcock and season the bird, make your turkey stock.
  • Wednesday: Drink Grill’n Time Cocktails.
  • Thursday: Get the turkey out of the fridge early and make some magic on that smoker.

Make the brine:

In a large pot, bring half of the water to a boil. Add the salt and sugar, stirring until they dissolve completely. Add the garlic cloves, peppercorns, and bay leaves to the hot water. Let it simmer for 5 minutes to infuse the flavors. Remove the pot from the heat, strain, and add the remaining water to cool the brine to room temperature. It is easiest to make this the day before.


Spatchcock the turkey:


Spatchcocking involves removing the backbone to flatten the bird, allowing for even faster cooking. 


To prep the turkey, remove the giblets, trim excess skin, pat it dry, and place it breast-side down on a stable cutting board. Save all the trim and parts for the stock! Cut along one side of the backbone using sharp kitchen shears from the tail to the neck. Repeat on the other side to remove the backbone entirely (save it for stock!). Flip the turkey over so it’s breast-side up. Press firmly on the breastbone until you hear a crack and the bird flattens. Tuck the wing tips under the breasts to prevent them from burning during cooking.


Season the turkey:


Move the turkey to a sheet pan with an inserted rack. Starting with the inside of the turkey facing up, liberally season with kosher salt and a nice thin sprinkling of pepper and garlic powder. DO NOT season under the skin for this recipe. Flip the bird skin-side up and repeat.


Using a meat injector, inject the meat with our brine. To do this, Insert the needle into the thickest parts of the turkey (breasts, thighs, and drumsticks). Press the plunger down slowly as you withdraw the needle to distribute the saline solution evenly within the muscle. Aim to inject 1-2 ounces of solution per pound of turkey, evenly spread across different areas.


The holes in the skin from the needle will help excess fat and steam escape from under the skin during cooking, making it crisp!


Put the turkey in the fridge, skin side up, for 24-36 hours.


Make the stock:


One advantage of prepping the turkey early is having ingredients for stock. Make this the day before! 


Rub the giblets, trimmed skin, and spine in olive oil and roast until light golden brown. Add them, along with the juices from the sheet tray, to a pot large enough to hold the stock and giblets. Add the stock and simmer until the stock has reduced slightly, about twenty minutes. Strain and allow it to cool. Store the story in the fridge.


Cook the turkey:


We are going to cook the turkey in two stages!


Preheat your smoker to 250º and remove your turkey 90 minutes before cooking. 


Place the herbs under the rack in the tray and place your turkey in the smoker, rotating the tray every 30 minutes until it reaches 153º – 155º in the breast and 165º in the thigh. The turkey will keep cooking. Poultry food safety is a factor of time and temperature. According to USDA, if the turkey gets to 155º intern for 47 seconds, it will be safe to eat. If you cook it to 165º on the smoker, it will hit 175º and be dry. If you have health concerns or love overcooked turkey, leave it on until the breast hits 165º and make extra gravy.


Allow the turkey to rest for 30-45 minutes (longer is okay; just tent it). Pour the pan juices into a bowl and reserve them for the gravy. 


Set up for searing the skin. We used our pizza oven at 600º, but you can also use a grill at 600º or a broiler with the turkey on a lower rack. Heat your butter and brush the skin. Place the turkey in the grill or oven until the skin gets golden brown, 3-5 minutes (watch it closely; turkey skin will go from golden to burnt and sad quickly).


It is ready to slice and serve!


Make the gravy:


Add the juice from the turkey sheet tray and the butter in a large skillet. Bring it to a simmer on medium-high heat. Reduce the heat and add the flour, cooking until it becomes light brown (2-3 minutes). Add the wine to deglaze the pan, then add the stock. Stir vigorously with a whisk to incorporate the rue and stock fully. Bring it to a simmer and stir until it thickens, about 3-5 minutes. Store in a thermos and keep it warm until you are ready to serve!

Comments:


Be The First To Comment:

Your email address will not be published. Required fields are marked *

Recipe Rating


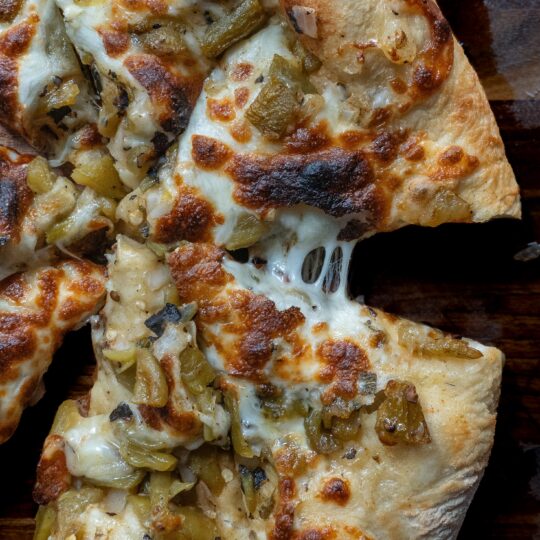
Hatch Chile Pizza

Roasted Hatch Chile Pizza

Author Mark & Fey
Course Dinner, Lunch
Keyword Hatch Chile, Pizza
Cook Time 30 minutes
Servings 4

Ingredients

  • 1 pound store bought pizza dough at room temperature
  • 1/3 cup all-purpose flour for rolling the pizza dough
  • 5 fire roasted hatch chiles without the stem
  • 1 cup white onion diced
  • 2 cup shredded mozzarella cheese
  • Olive oil for the crust
  • 1 tsp Mexican oregano
  • 1/4 tsp citric acid
  • 1/2 tsp New Mexico chili
  • 1 1/2 tbsp garlic paste
  • 1/2 tsp Salt and Pepper + Three Chiles

Instructions

  • Start by striping your fire roasted hatch chiles from all the char and roughly dice them. Set aside.
  • In a medium bowl, add your diced hatch chile, white onion, Salt and Pepper + Three Chiles, Mexican oregano, citric acid, New Mexico chili and your garlic paste. Mix well until evenly combined. Set aside.
  • To stretch your pizza dough, pour your all-purpose flour on a work surface. Place your pizza dough on the work surface and begin to stretch the dough with your hands. Then use a rolling pin to finish stretching your dough into a big circle. About 1/4 to 1/2 inch thick.
  • Add your hatch chile mix to your pizza dough and spread it out evenly. Top with your mozzarella cheese and transfer the pizza onto a baking sheet tray.
  • Set your oven to 450 degrees F. Cook your pizza for 10 to 14 minutes or until the cheese is fully melted and the crust is golden brown. Remove from the oven and place on a cutting board.
  • Drizzle some olive oil around the crust, slice your pizza into 8 slices and serve.
Double Brined

Chicken Al Pastor Tacos with a Kicking Mule

The perfect holiday turkey!

Cook Time 2-4 Hours

Prep Time 60 Minutes

Down Time 1-2 Days

Turkey

  • 1 x 12-14 12-14 pound whole turkey (not brined or injected with salt water solution)
  • Kosher salt
  • Black pepper
  • Garlic powder
  • Fresh poultry herbs (2-3 bunches from the grocery store)
  • ½ cup butter (clarified or ghee is even better)

Brine

  • 1 liter of water
  • 30 grams of Kosher salt
  • 5-6 cloves of garlic, smashed
  • 10 grams of brown sugar
  • 1 tablespoon of whole black pepper
  • 1 x bay leaf

Gravy

  • 6 cups chicken stock
  • 2T salted butter
  • ¼ cup AP flour
  • ½ cup dry white wine
  • Giblets and juices from the turkey

Wondering if you should wet brine or dry brine your Thanksgiving Turkey? The answer is… both!


This recipe will end dry, boring turkey. The outside is dry-brined for crispy, salty skin, and the inside is injected with a wet brine for juicy, perfectly seasoned meat.


This turkey is easy but requires some planning. If you are reading this on Thursday morning, you’ve already lost Thanksgiving! Okay, you haven’t lost; just don’t overcook the bird.


Here is a calendar to help you get organized:

  • Saturday: Remove your turkey from the freezer and place in the fridge.
  • Tuesday afternoon: Spatchcock and season the bird, make your turkey stock.
  • Wednesday: Drink Grill’n Time Cocktails.
  • Thursday: Get the turkey out of the fridge early and make some magic on that smoker.

Make the brine:

In a large pot, bring half of the water to a boil. Add the salt and sugar, stirring until they dissolve completely. Add the garlic cloves, peppercorns, and bay leaves to the hot water. Let it simmer for 5 minutes to infuse the flavors. Remove the pot from the heat, strain, and add the remaining water to cool the brine to room temperature. It is easiest to make this the day before.


Spatchcock the turkey:


Spatchcocking involves removing the backbone to flatten the bird, allowing for even faster cooking. 


To prep the turkey, remove the giblets, trim excess skin, pat it dry, and place it breast-side down on a stable cutting board. Save all the trim and parts for the stock! Cut along one side of the backbone using sharp kitchen shears from the tail to the neck. Repeat on the other side to remove the backbone entirely (save it for stock!). Flip the turkey over so it’s breast-side up. Press firmly on the breastbone until you hear a crack and the bird flattens. Tuck the wing tips under the breasts to prevent them from burning during cooking.


Season the turkey:


Move the turkey to a sheet pan with an inserted rack. Starting with the inside of the turkey facing up, liberally season with kosher salt and a nice thin sprinkling of pepper and garlic powder. DO NOT season under the skin for this recipe. Flip the bird skin-side up and repeat.


Using a meat injector, inject the meat with our brine. To do this, Insert the needle into the thickest parts of the turkey (breasts, thighs, and drumsticks). Press the plunger down slowly as you withdraw the needle to distribute the saline solution evenly within the muscle. Aim to inject 1-2 ounces of solution per pound of turkey, evenly spread across different areas.


The holes in the skin from the needle will help excess fat and steam escape from under the skin during cooking, making it crisp!


Put the turkey in the fridge, skin side up, for 24-36 hours.


Make the stock:


One advantage of prepping the turkey early is having ingredients for stock. Make this the day before! 


Rub the giblets, trimmed skin, and spine in olive oil and roast until light golden brown. Add them, along with the juices from the sheet tray, to a pot large enough to hold the stock and giblets. Add the stock and simmer until the stock has reduced slightly, about twenty minutes. Strain and allow it to cool. Store the story in the fridge.


Cook the turkey:


We are going to cook the turkey in two stages!


Preheat your smoker to 250º and remove your turkey 90 minutes before cooking. 


Place the herbs under the rack in the tray and place your turkey in the smoker, rotating the tray every 30 minutes until it reaches 153º – 155º in the breast and 165º in the thigh. The turkey will keep cooking. Poultry food safety is a factor of time and temperature. According to USDA, if the turkey gets to 155º intern for 47 seconds, it will be safe to eat. If you cook it to 165º on the smoker, it will hit 175º and be dry. If you have health concerns or love overcooked turkey, leave it on until the breast hits 165º and make extra gravy.


Allow the turkey to rest for 30-45 minutes (longer is okay; just tent it). Pour the pan juices into a bowl and reserve them for the gravy. 


Set up for searing the skin. We used our pizza oven at 600º, but you can also use a grill at 600º or a broiler with the turkey on a lower rack. Heat your butter and brush the skin. Place the turkey in the grill or oven until the skin gets golden brown, 3-5 minutes (watch it closely; turkey skin will go from golden to burnt and sad quickly).


It is ready to slice and serve!


Make the gravy:


Add the juice from the turkey sheet tray and the butter in a large skillet. Bring it to a simmer on medium-high heat. Reduce the heat and add the flour, cooking until it becomes light brown (2-3 minutes). Add the wine to deglaze the pan, then add the stock. Stir vigorously with a whisk to incorporate the rue and stock fully. Bring it to a simmer and stir until it thickens, about 3-5 minutes. Store in a thermos and keep it warm until you are ready to serve!
Comments:


Be The First To Comment:

Your email address will not be published. Required fields are marked *

Recipe Rating


Al Pastor Street Tacos

Chicken Al Pastor Tacos with a Kicking Mule

Author Mark & Fey
Course Dinner, Lunch, Tailgate
Keyword Al Pastor, Aviation American Gin, Chicken, Kicking Mule, Poultry, Tacos
Cook Time 30 minutes
Servings 4

Ingredients

For the Kicking Mule (1 Serving)

  • 1 1/2 oz Aviation American Gin
  • 1 lime juiced
  • 1 pinch cayenne pepper
  • Ice cubes to fill up the cup
  • 1 bottle of ginger beer
  • 1 slice candied jalapeno for garnishing
  • 1 slice charred lime for garnishing

For the Chicken Al Pastor Tacos

  • 1 pound boneless chicken thighs
  • Kosher salt for seasoning
  • 1 1/4 cup fresh pineapple diced
  • 2 fresh oranges juiced
  • 1 3/4 tbsp water
  • 1 3/4 tbsp white vinegar
  • 1 2/3 tbsp sugar
  • 1 tbsp Kosher salt
  • 2 1/2 tbsp achiote paste
  • 2 tsp dried oregano
  • 3 1/2 tsp garlic powder
  • 3 tsp cumin
  • 4 tsp chile powder
  • 1/2 cup white onion diced
  • 1/2 cup fresh cilantro chopped
  • 8 small flour tortillas
  • Your favorite hot sauce optional

Instructions

  • For the Kicking Mule:
  • In a cocktail shaker, add the ice cubes, followed by your Aviation American Gin, lime juice and the cayenne pepper. Stir (or shake) well for 10 seconds. Using a strainer, pour the mix into a glass (use a mule mug because it’s cool) with ice and top it off with your ginger beer. Add your candied jalapeno and charred lime to garnish.
  • For the Chicken Al Pastor Tacos:
  • Place your chicken thighs on a tray and season both sides with Kosher salt. Set aside.
  • In a blender, add 1 cup diced pineapple, your orange juice, water, white vinegar, sugar, 1 tbsp Kosher salt, achiote paste, oregano, garlic powder, cumin, and your chile powder. Blend until everything is evenly combined. Pour the marinade onto the chicken thighs making sure they are well coated.
  • Set a grill to medium high heat. On indirect heat, add your chicken thighs to cook until they reach an internal temperature of 165 degrees F. Remove from the grill and dice the chicken into small cubes. Add your 1/4 cup diced pineapple and mix it in until evenly combined with the chicken. Place your diced chicken with pineapple onto a tray and return to the grill on indirect heat for a couple more minutes. Remove from the heat and set aside.
  • Warm your tortillas on the grill for a couple minutes per side. Remove from the grill and set aside.
  • Begin building your tacos on a tortilla, adding your chicken and pineapple, followed by white onion and some fresh cilantro. Add your favorite hot sauce and devour immediately!
Double Brined

Sous Vide Picanha with Hatch Chile Chimichurri

The perfect holiday turkey!

Cook Time 2-4 Hours

Prep Time 60 Minutes

Down Time 1-2 Days

Turkey

  • 1 x 12-14 12-14 pound whole turkey (not brined or injected with salt water solution)
  • Kosher salt
  • Black pepper
  • Garlic powder
  • Fresh poultry herbs (2-3 bunches from the grocery store)
  • ½ cup butter (clarified or ghee is even better)

Brine

  • 1 liter of water
  • 30 grams of Kosher salt
  • 5-6 cloves of garlic, smashed
  • 10 grams of brown sugar
  • 1 tablespoon of whole black pepper
  • 1 x bay leaf

Gravy

  • 6 cups chicken stock
  • 2T salted butter
  • ¼ cup AP flour
  • ½ cup dry white wine
  • Giblets and juices from the turkey

Wondering if you should wet brine or dry brine your Thanksgiving Turkey? The answer is… both!


This recipe will end dry, boring turkey. The outside is dry-brined for crispy, salty skin, and the inside is injected with a wet brine for juicy, perfectly seasoned meat.


This turkey is easy but requires some planning. If you are reading this on Thursday morning, you’ve already lost Thanksgiving! Okay, you haven’t lost; just don’t overcook the bird.


Here is a calendar to help you get organized:

  • Saturday: Remove your turkey from the freezer and place in the fridge.
  • Tuesday afternoon: Spatchcock and season the bird, make your turkey stock.
  • Wednesday: Drink Grill’n Time Cocktails.
  • Thursday: Get the turkey out of the fridge early and make some magic on that smoker.

Make the brine:

In a large pot, bring half of the water to a boil. Add the salt and sugar, stirring until they dissolve completely. Add the garlic cloves, peppercorns, and bay leaves to the hot water. Let it simmer for 5 minutes to infuse the flavors. Remove the pot from the heat, strain, and add the remaining water to cool the brine to room temperature. It is easiest to make this the day before.


Spatchcock the turkey:


Spatchcocking involves removing the backbone to flatten the bird, allowing for even faster cooking. 


To prep the turkey, remove the giblets, trim excess skin, pat it dry, and place it breast-side down on a stable cutting board. Save all the trim and parts for the stock! Cut along one side of the backbone using sharp kitchen shears from the tail to the neck. Repeat on the other side to remove the backbone entirely (save it for stock!). Flip the turkey over so it’s breast-side up. Press firmly on the breastbone until you hear a crack and the bird flattens. Tuck the wing tips under the breasts to prevent them from burning during cooking.


Season the turkey:


Move the turkey to a sheet pan with an inserted rack. Starting with the inside of the turkey facing up, liberally season with kosher salt and a nice thin sprinkling of pepper and garlic powder. DO NOT season under the skin for this recipe. Flip the bird skin-side up and repeat.


Using a meat injector, inject the meat with our brine. To do this, Insert the needle into the thickest parts of the turkey (breasts, thighs, and drumsticks). Press the plunger down slowly as you withdraw the needle to distribute the saline solution evenly within the muscle. Aim to inject 1-2 ounces of solution per pound of turkey, evenly spread across different areas.


The holes in the skin from the needle will help excess fat and steam escape from under the skin during cooking, making it crisp!


Put the turkey in the fridge, skin side up, for 24-36 hours.


Make the stock:


One advantage of prepping the turkey early is having ingredients for stock. Make this the day before! 


Rub the giblets, trimmed skin, and spine in olive oil and roast until light golden brown. Add them, along with the juices from the sheet tray, to a pot large enough to hold the stock and giblets. Add the stock and simmer until the stock has reduced slightly, about twenty minutes. Strain and allow it to cool. Store the story in the fridge.


Cook the turkey:


We are going to cook the turkey in two stages!


Preheat your smoker to 250º and remove your turkey 90 minutes before cooking. 


Place the herbs under the rack in the tray and place your turkey in the smoker, rotating the tray every 30 minutes until it reaches 153º – 155º in the breast and 165º in the thigh. The turkey will keep cooking. Poultry food safety is a factor of time and temperature. According to USDA, if the turkey gets to 155º intern for 47 seconds, it will be safe to eat. If you cook it to 165º on the smoker, it will hit 175º and be dry. If you have health concerns or love overcooked turkey, leave it on until the breast hits 165º and make extra gravy.


Allow the turkey to rest for 30-45 minutes (longer is okay; just tent it). Pour the pan juices into a bowl and reserve them for the gravy. 


Set up for searing the skin. We used our pizza oven at 600º, but you can also use a grill at 600º or a broiler with the turkey on a lower rack. Heat your butter and brush the skin. Place the turkey in the grill or oven until the skin gets golden brown, 3-5 minutes (watch it closely; turkey skin will go from golden to burnt and sad quickly).


It is ready to slice and serve!


Make the gravy:


Add the juice from the turkey sheet tray and the butter in a large skillet. Bring it to a simmer on medium-high heat. Reduce the heat and add the flour, cooking until it becomes light brown (2-3 minutes). Add the wine to deglaze the pan, then add the stock. Stir vigorously with a whisk to incorporate the rue and stock fully. Bring it to a simmer and stir until it thickens, about 3-5 minutes. Store in a thermos and keep it warm until you are ready to serve!
Comments:


Be The First To Comment:

Your email address will not be published. Required fields are marked *

Recipe Rating


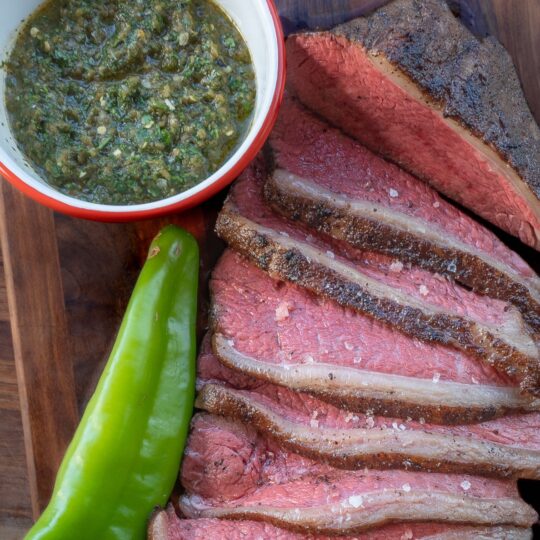
Picanha with Hatch Chile Chimichurri

Sous Vide Picanha with Hatch Chile Chimichurri

Author Mark & Fey
Course Dinner, Tailgate
Keyword Beef, Chimichurri, Hatch Chile, Picanha, Sous Vide
Cook Time 30 minutes
Servings 6

Ingredients

  • 1 2 to 2 1/2 pounds picanha steak
  • Kosher salt for seasoning
  • Black pepper for seasoning
  • Salt and Pepper + Three Chiles for seasoning
  • 1 big fire roasted hatch chile
  • 2 cups fresh parsley
  • 1 cup fresh cilantro
  • 5 garlic cloves
  • 1/4 cup red wine vinegar
  • 1 tsp citric acid
  • 1/4 cup olive oil

Instructions

  • Season your picanha steak with Kosher salt, black pepper and your Salt and Pepper + Three Chiles generously on all sides.
  • Set your sous vide to 133 degrees F. Add your picanha to cook until it reaches an internal temperature of 133 degrees F throughout the whole steak. Remove from the sous vide and set aside.
  • Set a grill to high heat. Add your picanha and sear on all sides for 1 to 2 minutes per side or until you get a perfect sear on all sides. Remove from the heat and set aside to rest for 6 to 8 minutes.
  • To make your hatch chile chimichurri, add into a blender your fire roasted hatch chile without the stem, parsley, cilantro, garlic, 1 tsp Salt and Pepper + Three Chiles, red wine vinegar, citric acid and begin to blend on medium speed until everything is evenly combined. Transfer your mixture into a medium bowl. Add your olive oil and whisk it in until evenly combined. Add Kosher salt to taste. Set aside.
  • Slice your picanha into 1/3 of an inch thick slices, sprinkle with sea salt and serve with a side of your hatch chile chimichurri.
Double Brined

Grilled Chicken Piccata

The perfect holiday turkey!

Cook Time 2-4 Hours

Prep Time 60 Minutes

Down Time 1-2 Days

Turkey

  • 1 x 12-14 12-14 pound whole turkey (not brined or injected with salt water solution)
  • Kosher salt
  • Black pepper
  • Garlic powder
  • Fresh poultry herbs (2-3 bunches from the grocery store)
  • ½ cup butter (clarified or ghee is even better)

Brine

  • 1 liter of water
  • 30 grams of Kosher salt
  • 5-6 cloves of garlic, smashed
  • 10 grams of brown sugar
  • 1 tablespoon of whole black pepper
  • 1 x bay leaf

Gravy

  • 6 cups chicken stock
  • 2T salted butter
  • ¼ cup AP flour
  • ½ cup dry white wine
  • Giblets and juices from the turkey

Wondering if you should wet brine or dry brine your Thanksgiving Turkey? The answer is… both!


This recipe will end dry, boring turkey. The outside is dry-brined for crispy, salty skin, and the inside is injected with a wet brine for juicy, perfectly seasoned meat.


This turkey is easy but requires some planning. If you are reading this on Thursday morning, you’ve already lost Thanksgiving! Okay, you haven’t lost; just don’t overcook the bird.


Here is a calendar to help you get organized:

  • Saturday: Remove your turkey from the freezer and place in the fridge.
  • Tuesday afternoon: Spatchcock and season the bird, make your turkey stock.
  • Wednesday: Drink Grill’n Time Cocktails.
  • Thursday: Get the turkey out of the fridge early and make some magic on that smoker.

Make the brine:

In a large pot, bring half of the water to a boil. Add the salt and sugar, stirring until they dissolve completely. Add the garlic cloves, peppercorns, and bay leaves to the hot water. Let it simmer for 5 minutes to infuse the flavors. Remove the pot from the heat, strain, and add the remaining water to cool the brine to room temperature. It is easiest to make this the day before.


Spatchcock the turkey:


Spatchcocking involves removing the backbone to flatten the bird, allowing for even faster cooking. 


To prep the turkey, remove the giblets, trim excess skin, pat it dry, and place it breast-side down on a stable cutting board. Save all the trim and parts for the stock! Cut along one side of the backbone using sharp kitchen shears from the tail to the neck. Repeat on the other side to remove the backbone entirely (save it for stock!). Flip the turkey over so it’s breast-side up. Press firmly on the breastbone until you hear a crack and the bird flattens. Tuck the wing tips under the breasts to prevent them from burning during cooking.


Season the turkey:


Move the turkey to a sheet pan with an inserted rack. Starting with the inside of the turkey facing up, liberally season with kosher salt and a nice thin sprinkling of pepper and garlic powder. DO NOT season under the skin for this recipe. Flip the bird skin-side up and repeat.


Using a meat injector, inject the meat with our brine. To do this, Insert the needle into the thickest parts of the turkey (breasts, thighs, and drumsticks). Press the plunger down slowly as you withdraw the needle to distribute the saline solution evenly within the muscle. Aim to inject 1-2 ounces of solution per pound of turkey, evenly spread across different areas.


The holes in the skin from the needle will help excess fat and steam escape from under the skin during cooking, making it crisp!


Put the turkey in the fridge, skin side up, for 24-36 hours.


Make the stock:


One advantage of prepping the turkey early is having ingredients for stock. Make this the day before! 


Rub the giblets, trimmed skin, and spine in olive oil and roast until light golden brown. Add them, along with the juices from the sheet tray, to a pot large enough to hold the stock and giblets. Add the stock and simmer until the stock has reduced slightly, about twenty minutes. Strain and allow it to cool. Store the story in the fridge.


Cook the turkey:


We are going to cook the turkey in two stages!


Preheat your smoker to 250º and remove your turkey 90 minutes before cooking. 


Place the herbs under the rack in the tray and place your turkey in the smoker, rotating the tray every 30 minutes until it reaches 153º – 155º in the breast and 165º in the thigh. The turkey will keep cooking. Poultry food safety is a factor of time and temperature. According to USDA, if the turkey gets to 155º intern for 47 seconds, it will be safe to eat. If you cook it to 165º on the smoker, it will hit 175º and be dry. If you have health concerns or love overcooked turkey, leave it on until the breast hits 165º and make extra gravy.


Allow the turkey to rest for 30-45 minutes (longer is okay; just tent it). Pour the pan juices into a bowl and reserve them for the gravy. 


Set up for searing the skin. We used our pizza oven at 600º, but you can also use a grill at 600º or a broiler with the turkey on a lower rack. Heat your butter and brush the skin. Place the turkey in the grill or oven until the skin gets golden brown, 3-5 minutes (watch it closely; turkey skin will go from golden to burnt and sad quickly).


It is ready to slice and serve!


Make the gravy:


Add the juice from the turkey sheet tray and the butter in a large skillet. Bring it to a simmer on medium-high heat. Reduce the heat and add the flour, cooking until it becomes light brown (2-3 minutes). Add the wine to deglaze the pan, then add the stock. Stir vigorously with a whisk to incorporate the rue and stock fully. Bring it to a simmer and stir until it thickens, about 3-5 minutes. Store in a thermos and keep it warm until you are ready to serve!

Comments:


Be The First To Comment:

Your email address will not be published. Required fields are marked *

Recipe Rating


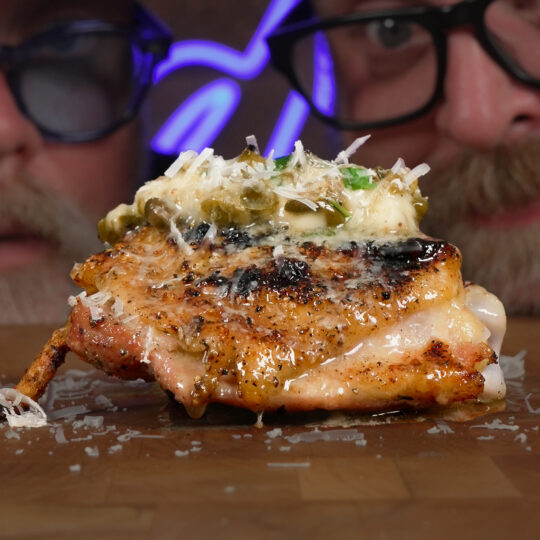
Grilled Chicken Piccata

Grilled Chicken Piccata

Author Mark & Fey
Course Dinner, Lunch
Keyword Chicken Piccata, Compound Butter, Poultry
Cook Time 25 minutes
Servings 4

Ingredients

  • 4 bone-in skin-on chicken thighs
  • Kosher salt for seasoning
  • Black pepper for seasoning
  • Garlic powder for seasoning
  • 5 tbsp unsalted butter at room temperature
  • 1 tsp garlic finely diced
  • 1 1/2 tbsp capers drained
  • 2 tbsp fresh lemon juice
  • 1/2 cup dry white wine
  • 1 1/2 tbsp parsley finely chopped
  • 1/2 cup grated parmesan cheese

Instructions

  • On a tray, season your chicken thighs with salt, black pepper and garlic powder generously on both sides. Put the chicken thighs in the fridge uncovered to let them brine for at least 12 hours.
  • In a medium saucepan set to medium heat, add 2 tbsp of butter and garlic to cook for a couple minutes until the butter is fully melted and the garlic starts to pick up some color. Add your drained capers, lemon juice and your white wine. Stir until evenly combined and smash some of the capers as well. Let it simmer for 4 to 5 minutes or until fully reduced. Season with salt and pepper to taste. Remove from the heat and set aside.
  • In a medium bowl, add the remaining butter, followed by the parmesan cheese, your cooked capers and parsley. Mix well until evenly combined. Set aside.
  • On a grill set to medium high heat, cook your chicken thighs for 6 to 8 minutes per side, 16 minutes total or until it reaches an internal temperature of 160 degrees F. Remove from the grill and set aside.
  • Serve your grilled chicken and top with your piccata. Melt the piccata using a torch or by placing your chicken thighs in a skillet or pan set to medium heat and cook covered with a cloche for 1 minute or until the piccata begins to melt. Remove from the heat and serve. Enjoy!
Double Brined

Nathan’s Style Hot Dogs

The perfect holiday turkey!

Cook Time 2-4 Hours

Prep Time 60 Minutes

Down Time 1-2 Days

Turkey

  • 1 x 12-14 12-14 pound whole turkey (not brined or injected with salt water solution)
  • Kosher salt
  • Black pepper
  • Garlic powder
  • Fresh poultry herbs (2-3 bunches from the grocery store)
  • ½ cup butter (clarified or ghee is even better)

Brine

  • 1 liter of water
  • 30 grams of Kosher salt
  • 5-6 cloves of garlic, smashed
  • 10 grams of brown sugar
  • 1 tablespoon of whole black pepper
  • 1 x bay leaf

Gravy

  • 6 cups chicken stock
  • 2T salted butter
  • ¼ cup AP flour
  • ½ cup dry white wine
  • Giblets and juices from the turkey

Wondering if you should wet brine or dry brine your Thanksgiving Turkey? The answer is… both!


This recipe will end dry, boring turkey. The outside is dry-brined for crispy, salty skin, and the inside is injected with a wet brine for juicy, perfectly seasoned meat.


This turkey is easy but requires some planning. If you are reading this on Thursday morning, you’ve already lost Thanksgiving! Okay, you haven’t lost; just don’t overcook the bird.


Here is a calendar to help you get organized:

  • Saturday: Remove your turkey from the freezer and place in the fridge.
  • Tuesday afternoon: Spatchcock and season the bird, make your turkey stock.
  • Wednesday: Drink Grill’n Time Cocktails.
  • Thursday: Get the turkey out of the fridge early and make some magic on that smoker.

Make the brine:

In a large pot, bring half of the water to a boil. Add the salt and sugar, stirring until they dissolve completely. Add the garlic cloves, peppercorns, and bay leaves to the hot water. Let it simmer for 5 minutes to infuse the flavors. Remove the pot from the heat, strain, and add the remaining water to cool the brine to room temperature. It is easiest to make this the day before.


Spatchcock the turkey:


Spatchcocking involves removing the backbone to flatten the bird, allowing for even faster cooking. 


To prep the turkey, remove the giblets, trim excess skin, pat it dry, and place it breast-side down on a stable cutting board. Save all the trim and parts for the stock! Cut along one side of the backbone using sharp kitchen shears from the tail to the neck. Repeat on the other side to remove the backbone entirely (save it for stock!). Flip the turkey over so it’s breast-side up. Press firmly on the breastbone until you hear a crack and the bird flattens. Tuck the wing tips under the breasts to prevent them from burning during cooking.


Season the turkey:


Move the turkey to a sheet pan with an inserted rack. Starting with the inside of the turkey facing up, liberally season with kosher salt and a nice thin sprinkling of pepper and garlic powder. DO NOT season under the skin for this recipe. Flip the bird skin-side up and repeat.


Using a meat injector, inject the meat with our brine. To do this, Insert the needle into the thickest parts of the turkey (breasts, thighs, and drumsticks). Press the plunger down slowly as you withdraw the needle to distribute the saline solution evenly within the muscle. Aim to inject 1-2 ounces of solution per pound of turkey, evenly spread across different areas.


The holes in the skin from the needle will help excess fat and steam escape from under the skin during cooking, making it crisp!


Put the turkey in the fridge, skin side up, for 24-36 hours.


Make the stock:


One advantage of prepping the turkey early is having ingredients for stock. Make this the day before! 


Rub the giblets, trimmed skin, and spine in olive oil and roast until light golden brown. Add them, along with the juices from the sheet tray, to a pot large enough to hold the stock and giblets. Add the stock and simmer until the stock has reduced slightly, about twenty minutes. Strain and allow it to cool. Store the story in the fridge.


Cook the turkey:


We are going to cook the turkey in two stages!


Preheat your smoker to 250º and remove your turkey 90 minutes before cooking. 


Place the herbs under the rack in the tray and place your turkey in the smoker, rotating the tray every 30 minutes until it reaches 153º – 155º in the breast and 165º in the thigh. The turkey will keep cooking. Poultry food safety is a factor of time and temperature. According to USDA, if the turkey gets to 155º intern for 47 seconds, it will be safe to eat. If you cook it to 165º on the smoker, it will hit 175º and be dry. If you have health concerns or love overcooked turkey, leave it on until the breast hits 165º and make extra gravy.


Allow the turkey to rest for 30-45 minutes (longer is okay; just tent it). Pour the pan juices into a bowl and reserve them for the gravy. 


Set up for searing the skin. We used our pizza oven at 600º, but you can also use a grill at 600º or a broiler with the turkey on a lower rack. Heat your butter and brush the skin. Place the turkey in the grill or oven until the skin gets golden brown, 3-5 minutes (watch it closely; turkey skin will go from golden to burnt and sad quickly).


It is ready to slice and serve!


Make the gravy:


Add the juice from the turkey sheet tray and the butter in a large skillet. Bring it to a simmer on medium-high heat. Reduce the heat and add the flour, cooking until it becomes light brown (2-3 minutes). Add the wine to deglaze the pan, then add the stock. Stir vigorously with a whisk to incorporate the rue and stock fully. Bring it to a simmer and stir until it thickens, about 3-5 minutes. Store in a thermos and keep it warm until you are ready to serve!
Comments:


Be The First To Comment:

Your email address will not be published. Required fields are marked *

Recipe Rating


Nathan's Hot Dog

Nathan’s Style Hot Dogs

Author Mark & Fey
Course Dinner, Lunch
Keyword Beef, Chili, hot dogs
Cook Time 20 minutes
Servings 8

Ingredients

For the Chili

  • 3 tbsp olive oil
  • 1 small white onion diced
  • Salt for seasoning
  • 1 clove of garlic minced
  • 1 tbsp garlic powder
  • 1 tsp chili powder
  • 1 tsp cumin
  • 1 tsp ancho chili powder
  • 1 tsp cayenne pepper
  • 1 6 oz can of tomato paste
  • 2 cups of water
  • 1 pound ground beef

For the Hot Dogs

  • 1 12oz pack Nathan's Famous Jumbo Restaurant Style Beef Franks
  • 8 hot dog buns
  • 1/2 cup shredded cheddar cheese
  • 1/3 cup white onion diced

Instructions

  • For the Chili, heat a large non-stick skillet over medium high heat. Add about 3 tablespoons of olive oil and the onions. Season with salt and cook until softened, about 5 minutes. Add your garlic and mix it in. Add all of your spices, the tomato paste and the 2 cups of water and cook for a minute more. Add in the ground beef, breaking it up with a spatula, and season with more salt to taste. Cook the beef until browned and no pick remains, about 8 minutes total.
  • On a griddle or grill, cook the hot dogs over high heat until crisped, about 3 minutes total. Build the dogs by adding a hot dog to each bun, topping with the chili, garnishing with cheddar cheese and white onion before devouring.
  • Pair it with your favorite homemade (or frozen) french fries and top them with the chili, cheddar cheese and white onion as well.
Double Brined

Flat Top Cholula Chicken Wrap

The perfect holiday turkey!

Cook Time 2-4 Hours

Prep Time 60 Minutes

Down Time 1-2 Days

Turkey

  • 1 x 12-14 12-14 pound whole turkey (not brined or injected with salt water solution)
  • Kosher salt
  • Black pepper
  • Garlic powder
  • Fresh poultry herbs (2-3 bunches from the grocery store)
  • ½ cup butter (clarified or ghee is even better)

Brine

  • 1 liter of water
  • 30 grams of Kosher salt
  • 5-6 cloves of garlic, smashed
  • 10 grams of brown sugar
  • 1 tablespoon of whole black pepper
  • 1 x bay leaf

Gravy

  • 6 cups chicken stock
  • 2T salted butter
  • ¼ cup AP flour
  • ½ cup dry white wine
  • Giblets and juices from the turkey

Wondering if you should wet brine or dry brine your Thanksgiving Turkey? The answer is… both!


This recipe will end dry, boring turkey. The outside is dry-brined for crispy, salty skin, and the inside is injected with a wet brine for juicy, perfectly seasoned meat.


This turkey is easy but requires some planning. If you are reading this on Thursday morning, you’ve already lost Thanksgiving! Okay, you haven’t lost; just don’t overcook the bird.


Here is a calendar to help you get organized:

  • Saturday: Remove your turkey from the freezer and place in the fridge.
  • Tuesday afternoon: Spatchcock and season the bird, make your turkey stock.
  • Wednesday: Drink Grill’n Time Cocktails.
  • Thursday: Get the turkey out of the fridge early and make some magic on that smoker.

Make the brine:

In a large pot, bring half of the water to a boil. Add the salt and sugar, stirring until they dissolve completely. Add the garlic cloves, peppercorns, and bay leaves to the hot water. Let it simmer for 5 minutes to infuse the flavors. Remove the pot from the heat, strain, and add the remaining water to cool the brine to room temperature. It is easiest to make this the day before.


Spatchcock the turkey:


Spatchcocking involves removing the backbone to flatten the bird, allowing for even faster cooking. 


To prep the turkey, remove the giblets, trim excess skin, pat it dry, and place it breast-side down on a stable cutting board. Save all the trim and parts for the stock! Cut along one side of the backbone using sharp kitchen shears from the tail to the neck. Repeat on the other side to remove the backbone entirely (save it for stock!). Flip the turkey over so it’s breast-side up. Press firmly on the breastbone until you hear a crack and the bird flattens. Tuck the wing tips under the breasts to prevent them from burning during cooking.


Season the turkey:


Move the turkey to a sheet pan with an inserted rack. Starting with the inside of the turkey facing up, liberally season with kosher salt and a nice thin sprinkling of pepper and garlic powder. DO NOT season under the skin for this recipe. Flip the bird skin-side up and repeat.


Using a meat injector, inject the meat with our brine. To do this, Insert the needle into the thickest parts of the turkey (breasts, thighs, and drumsticks). Press the plunger down slowly as you withdraw the needle to distribute the saline solution evenly within the muscle. Aim to inject 1-2 ounces of solution per pound of turkey, evenly spread across different areas.


The holes in the skin from the needle will help excess fat and steam escape from under the skin during cooking, making it crisp!


Put the turkey in the fridge, skin side up, for 24-36 hours.


Make the stock:


One advantage of prepping the turkey early is having ingredients for stock. Make this the day before! 


Rub the giblets, trimmed skin, and spine in olive oil and roast until light golden brown. Add them, along with the juices from the sheet tray, to a pot large enough to hold the stock and giblets. Add the stock and simmer until the stock has reduced slightly, about twenty minutes. Strain and allow it to cool. Store the story in the fridge.


Cook the turkey:


We are going to cook the turkey in two stages!


Preheat your smoker to 250º and remove your turkey 90 minutes before cooking. 


Place the herbs under the rack in the tray and place your turkey in the smoker, rotating the tray every 30 minutes until it reaches 153º – 155º in the breast and 165º in the thigh. The turkey will keep cooking. Poultry food safety is a factor of time and temperature. According to USDA, if the turkey gets to 155º intern for 47 seconds, it will be safe to eat. If you cook it to 165º on the smoker, it will hit 175º and be dry. If you have health concerns or love overcooked turkey, leave it on until the breast hits 165º and make extra gravy.


Allow the turkey to rest for 30-45 minutes (longer is okay; just tent it). Pour the pan juices into a bowl and reserve them for the gravy. 


Set up for searing the skin. We used our pizza oven at 600º, but you can also use a grill at 600º or a broiler with the turkey on a lower rack. Heat your butter and brush the skin. Place the turkey in the grill or oven until the skin gets golden brown, 3-5 minutes (watch it closely; turkey skin will go from golden to burnt and sad quickly).


It is ready to slice and serve!


Make the gravy:


Add the juice from the turkey sheet tray and the butter in a large skillet. Bring it to a simmer on medium-high heat. Reduce the heat and add the flour, cooking until it becomes light brown (2-3 minutes). Add the wine to deglaze the pan, then add the stock. Stir vigorously with a whisk to incorporate the rue and stock fully. Bring it to a simmer and stir until it thickens, about 3-5 minutes. Store in a thermos and keep it warm until you are ready to serve!

Comments:


Be The First To Comment:

Your email address will not be published. Required fields are marked *

Recipe Rating


Flat Top Cholula Chicken Wrap

Flat Top Cholula Chicken Wrap

Author Mark & Fey
Course Dinner, Lunch
Keyword Burrito, Chicken Wrap, Cholula, Poultry, Wrap
Cook Time 20 minutes
Servings 4

Ingredients

  • 1 pound boneless chicken thighs cubed
  • 4 large flour tortillas
  • Kosher salt for seasoning
  • Black pepper for seasoning
  • Olive oil for the pan
  • 3 medium roma tomatoes chopped
  • 1 red onion chopped
  • 1 head iceberg lettuce finely sliced into shreds
  • 1/2 cup shredded cheddar cheese
  • Cholula Hot Sauce
  • 1/2 cup of your favorite blue cheese dressing
  • 1 tsp cayenne pepper
  • 1 tsp smoked paprika

Instructions

  • Heat a large skillet or a flat top to medium high heat and coat with olive oil. Add your chicken, season with salt and black pepper and sear for a couple minutes. Add your Cholula Hot Sauce to the chicken and mix it in. Cover with a cloche and cook for about 8 minutes. Remove from the heat and set aside.
  • Add the cayenne pepper and the smoked paprika to your blue cheese dressing and mix it in until evenly combined.
  • Build the wraps on a tortilla by adding some shredded lettuce, chopped tomatoes, chopped onion, salt and pepper for seasoning, cheddar cheese, the Cholula chicken and top it with your kicked up blue cheese dressing. Fold the side of the wrap in and then roll up the wrap. Return the wraps to the hot skillet or flat top briefly to brown the wrap on all sides, about 2 minutes per side. Remove from the heat and serve while hot.