+
Shop the Grill Dads
Double Brined

Thanksgiving Turkey

The perfect holiday turkey!

Cook Time 2-4 Hours

Prep Time 60 Minutes

Down Time 1-2 Days

Turkey

  • 1 x 12-14 12-14 pound whole turkey (not brined or injected with salt water solution)
  • Kosher salt
  • Black pepper
  • Garlic powder
  • Fresh poultry herbs (2-3 bunches from the grocery store)
  • ½ cup butter (clarified or ghee is even better)

Brine

  • 1 liter of water
  • 30 grams of Kosher salt
  • 5-6 cloves of garlic, smashed
  • 10 grams of brown sugar
  • 1 tablespoon of whole black pepper
  • 1 x bay leaf

Gravy

  • 6 cups chicken stock
  • 2T salted butter
  • ¼ cup AP flour
  • ½ cup dry white wine
  • Giblets and juices from the turkey

Wondering if you should wet brine or dry brine your Thanksgiving Turkey? The answer is… both!


This recipe will end dry, boring turkey. The outside is dry-brined for crispy, salty skin, and the inside is injected with a wet brine for juicy, perfectly seasoned meat.


This turkey is easy but requires some planning. If you are reading this on Thursday morning, you’ve already lost Thanksgiving! Okay, you haven’t lost; just don’t overcook the bird.


Here is a calendar to help you get organized:

  • Saturday: Remove your turkey from the freezer and place in the fridge.
  • Tuesday afternoon: Spatchcock and season the bird, make your turkey stock.
  • Wednesday: Drink Grill’n Time Cocktails.
  • Thursday: Get the turkey out of the fridge early and make some magic on that smoker.

Make the brine:

In a large pot, bring half of the water to a boil. Add the salt and sugar, stirring until they dissolve completely. Add the garlic cloves, peppercorns, and bay leaves to the hot water. Let it simmer for 5 minutes to infuse the flavors. Remove the pot from the heat, strain, and add the remaining water to cool the brine to room temperature. It is easiest to make this the day before.


Spatchcock the turkey:


Spatchcocking involves removing the backbone to flatten the bird, allowing for even faster cooking. 


To prep the turkey, remove the giblets, trim excess skin, pat it dry, and place it breast-side down on a stable cutting board. Save all the trim and parts for the stock! Cut along one side of the backbone using sharp kitchen shears from the tail to the neck. Repeat on the other side to remove the backbone entirely (save it for stock!). Flip the turkey over so it’s breast-side up. Press firmly on the breastbone until you hear a crack and the bird flattens. Tuck the wing tips under the breasts to prevent them from burning during cooking.


Season the turkey:


Move the turkey to a sheet pan with an inserted rack. Starting with the inside of the turkey facing up, liberally season with kosher salt and a nice thin sprinkling of pepper and garlic powder. DO NOT season under the skin for this recipe. Flip the bird skin-side up and repeat.


Using a meat injector, inject the meat with our brine. To do this, Insert the needle into the thickest parts of the turkey (breasts, thighs, and drumsticks). Press the plunger down slowly as you withdraw the needle to distribute the saline solution evenly within the muscle. Aim to inject 1-2 ounces of solution per pound of turkey, evenly spread across different areas.


The holes in the skin from the needle will help excess fat and steam escape from under the skin during cooking, making it crisp!


Put the turkey in the fridge, skin side up, for 24-36 hours.


Make the stock:


One advantage of prepping the turkey early is having ingredients for stock. Make this the day before! 


Rub the giblets, trimmed skin, and spine in olive oil and roast until light golden brown. Add them, along with the juices from the sheet tray, to a pot large enough to hold the stock and giblets. Add the stock and simmer until the stock has reduced slightly, about twenty minutes. Strain and allow it to cool. Store the story in the fridge.


Cook the turkey:


We are going to cook the turkey in two stages!


Preheat your smoker to 250º and remove your turkey 90 minutes before cooking. 


Place the herbs under the rack in the tray and place your turkey in the smoker, rotating the tray every 30 minutes until it reaches 153º – 155º in the breast and 165º in the thigh. The turkey will keep cooking. Poultry food safety is a factor of time and temperature. According to USDA, if the turkey gets to 155º intern for 47 seconds, it will be safe to eat. If you cook it to 165º on the smoker, it will hit 175º and be dry. If you have health concerns or love overcooked turkey, leave it on until the breast hits 165º and make extra gravy.


Allow the turkey to rest for 30-45 minutes (longer is okay; just tent it). Pour the pan juices into a bowl and reserve them for the gravy. 


Set up for searing the skin. We used our pizza oven at 600º, but you can also use a grill at 600º or a broiler with the turkey on a lower rack. Heat your butter and brush the skin. Place the turkey in the grill or oven until the skin gets golden brown, 3-5 minutes (watch it closely; turkey skin will go from golden to burnt and sad quickly).


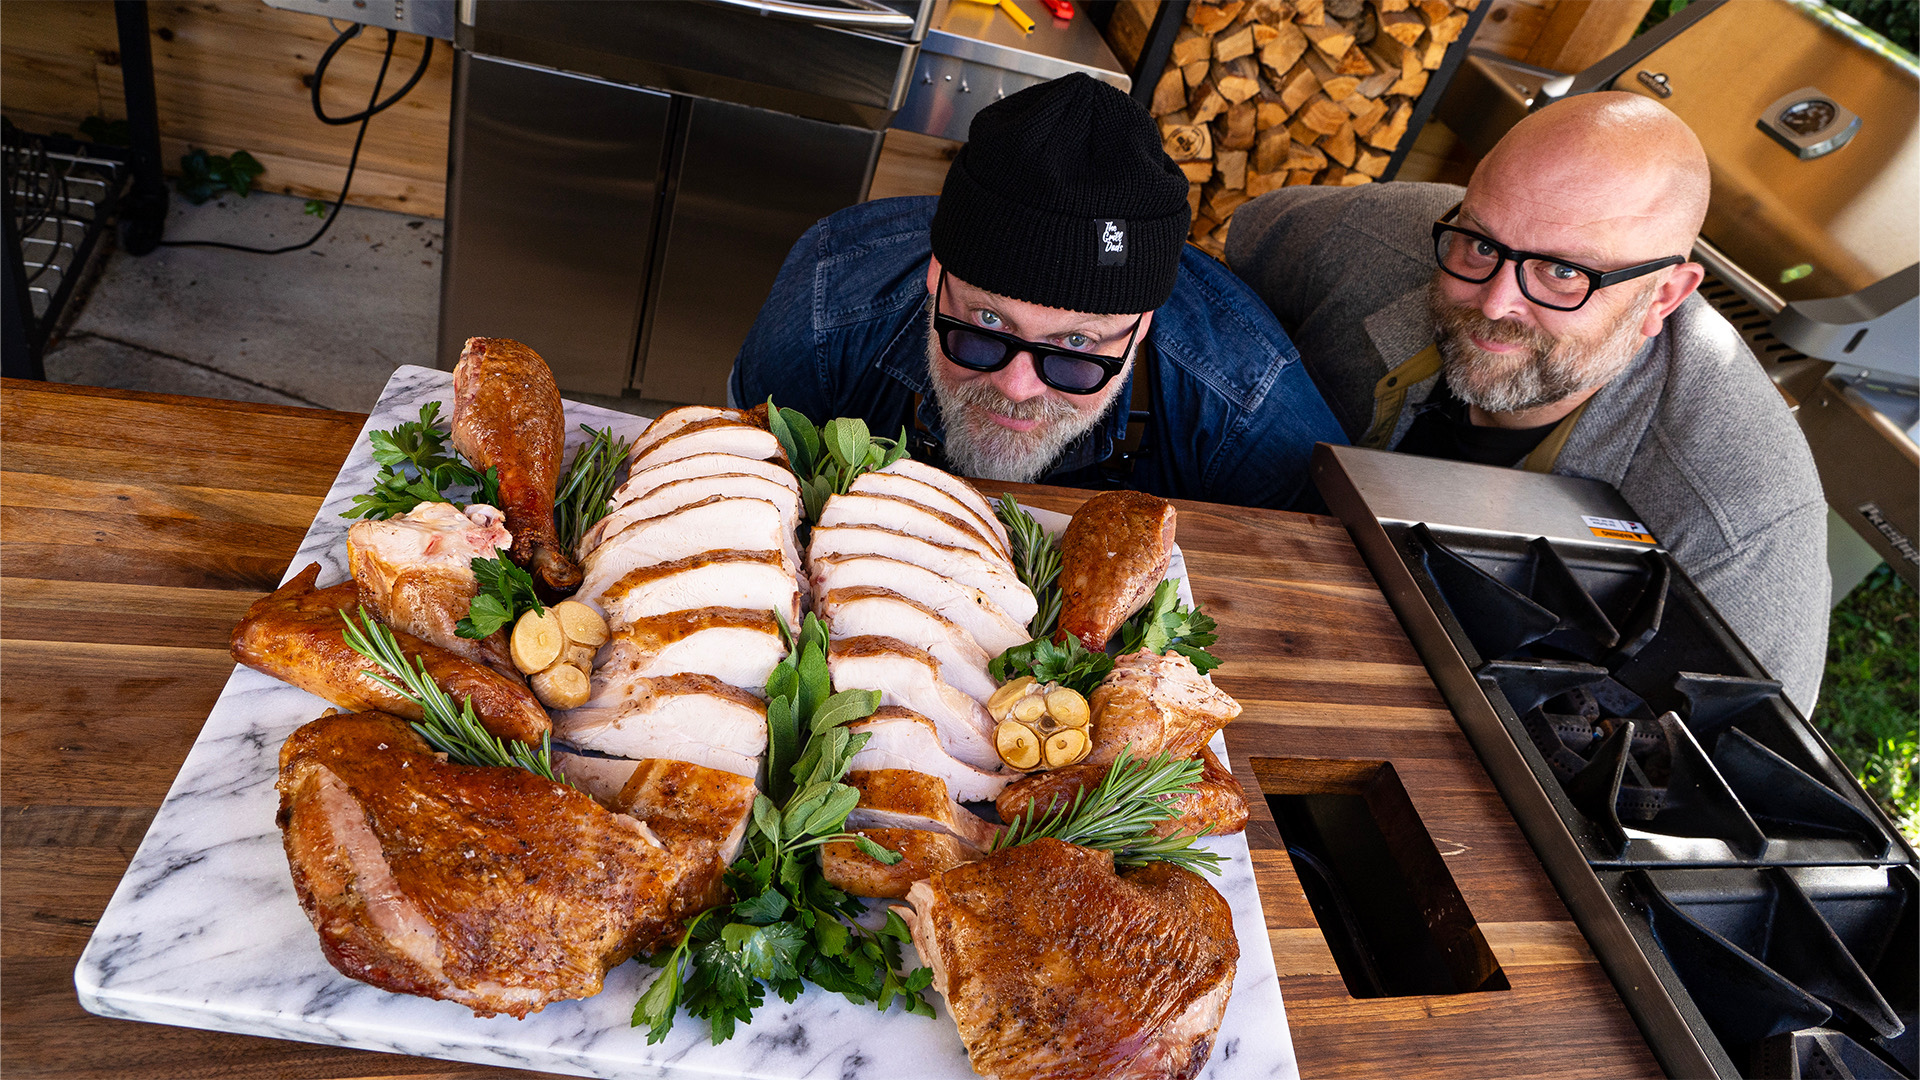
It is ready to slice and serve!


Make the gravy:


Add the juice from the turkey sheet tray and the butter in a large skillet. Bring it to a simmer on medium-high heat. Reduce the heat and add the flour, cooking until it becomes light brown (2-3 minutes). Add the wine to deglaze the pan, then add the stock. Stir vigorously with a whisk to incorporate the rue and stock fully. Bring it to a simmer and stir until it thickens, about 3-5 minutes. Store in a thermos and keep it warm until you are ready to serve!

Comments:


Be The First To Comment:

Your email address will not be published. Required fields are marked *

Recipe Rating


Double Brined Thanksgiving Turkey The perfect holiday turkey!

Author Mark & Fey
Course Dinner
Cuisine Holiday
Keyword Brine, gravy, Poultry, smoked, smoked salmon, Thanksgiving, Turkey
Prep Time 1 hour
Cook Time 2 minutes
Servings 1

Ingredients

Turkey

  • 1 x 12-14 12-14 pound whole turkey not brined or injected with salt water solution
  • Kosher salt
  • Black pepper
  • Garlic powder
  • Fresh poultry herbs 2-3 bunches from the grocery store
  • ½ cup butter clarified or ghee is even better

Brine

  • 1 liter of water
  • 30 grams of Kosher salt
  • 5-6 cloves of garlic smashed
  • 10 grams of brown sugar
  • 1 tablespoon of whole black pepper
  • 1 x bay leaf

Gravy

  • 6 cups chicken stock
  • 2 T salted butter
  • ¼ cup AP flour
  • ½ cup dry white wine
  • Giblets and juices from the turkey

Instructions

  • Wondering if you should wet brine or dry brine your Thanksgiving Turkey? The answer is… both!
  • This recipe will end dry, boring turkey. The outside is dry-brined for crispy, salty skin, and the inside is injected with a wet brine for juicy, perfectly seasoned meat.
  • This turkey is easy but requires some planning. If you are reading this on Thursday morning, you’ve already lost Thanksgiving! Okay, you haven’t lost; just don’t overcook the bird.
  • Here is a calendar to help you get organized: Saturday: Remove your turkey from the freezer and place in the fridge. Tuesday afternoon: Spatchcock and season the bird, make your turkey stock. Wednesday: Drink Grill’n Time Cocktails. Thursday: Get the turkey out of the fridge early and make some magic on that smoker. Make the brine: In a large pot, bring half of the water to a boil. Add the salt and sugar, stirring until they dissolve completely. Add the garlic cloves, peppercorns, and bay leaves to the hot water. Let it simmer for 5 minutes to infuse the flavors. Remove the pot from the heat, strain, and add the remaining water to cool the brine to room temperature. It is easiest to make this the day before.
  • Spatchcock the turkey:
  • Spatchcocking involves removing the backbone to flatten the bird, allowing for even faster cooking. 
  • To prep the turkey, remove the giblets, trim excess skin, pat it dry, and place it breast-side down on a stable cutting board. Save all the trim and parts for the stock! Cut along one side of the backbone using sharp kitchen shears from the tail to the neck. Repeat on the other side to remove the backbone entirely (save it for stock!). Flip the turkey over so it’s breast-side up. Press firmly on the breastbone until you hear a crack and the bird flattens. Tuck the wing tips under the breasts to prevent them from burning during cooking.
  • Season the turkey:
  • Move the turkey to a sheet pan with an inserted rack. Starting with the inside of the turkey facing up, liberally season with kosher salt and a nice thin sprinkling of pepper and garlic powder. DO NOT season under the skin for this recipe. Flip the bird skin-side up and repeat.
  • Using a meat injector, inject the meat with our brine. To do this, Insert the needle into the thickest parts of the turkey (breasts, thighs, and drumsticks). Press the plunger down slowly as you withdraw the needle to distribute the saline solution evenly within the muscle. Aim to inject 1-2 ounces of solution per pound of turkey, evenly spread across different areas.
  • The holes in the skin from the needle will help excess fat and steam escape from under the skin during cooking, making it crisp!
  • Put the turkey in the fridge, skin side up, for 24-36 hours.
  • Make the stock:
  • One advantage of prepping the turkey early is having ingredients for stock. Make this the day before! 
  • Rub the giblets, trimmed skin, and spine in olive oil and roast until light golden brown. Add them, along with the juices from the sheet tray, to a pot large enough to hold the stock and giblets. Add the stock and simmer until the stock has reduced slightly, about twenty minutes. Strain and allow it to cool. Store the story in the fridge.
  • Cook the turkey:
  • We are going to cook the turkey in two stages!
  • Preheat your smoker to 250º and remove your turkey 90 minutes before cooking. 
  • Place the herbs under the rack in the tray and place your turkey in the smoker, rotating the tray every 30 minutes until it reaches 153º – 155º in the breast and 165º in the thigh. The turkey will keep cooking. Poultry food safety is a factor of time and temperature. According to USDA, if the turkey gets to 155º intern for 47 seconds, it will be safe to eat. If you cook it to 165º on the smoker, it will hit 175º and be dry. If you have health concerns or love overcooked turkey, leave it on until the breast hits 165º and make extra gravy.
  • Allow the turkey to rest for 30-45 minutes (longer is okay; just tent it). Pour the pan juices into a bowl and reserve them for the gravy. 
  • Set up for searing the skin. We used our pizza oven at 600º, but you can also use a grill at 600º or a broiler with the turkey on a lower rack. Heat your butter and brush the skin. Place the turkey in the grill or oven until the skin gets golden brown, 3-5 minutes (watch it closely; turkey skin will go from golden to burnt and sad quickly).
  • It is ready to slice and serve!
  • Make the gravy:
  • Add the juice from the turkey sheet tray and the butter in a large skillet. Bring it to a simmer on medium-high heat. Reduce the heat and add the flour, cooking until it becomes light brown (2-3 minutes). Add the wine to deglaze the pan, then add the stock. Stir vigorously with a whisk to incorporate the rue and stock fully. Bring it to a simmer and stir until it thickens, about 3-5 minutes. Store in a thermos and keep it warm until you are ready to serve!
Video

Double Brined

Ninja Woodfire Thanksgiving

The perfect holiday turkey!

Cook Time 2-4 Hours

Prep Time 60 Minutes

Down Time 1-2 Days

Turkey

  • 1 x 12-14 12-14 pound whole turkey (not brined or injected with salt water solution)
  • Kosher salt
  • Black pepper
  • Garlic powder
  • Fresh poultry herbs (2-3 bunches from the grocery store)
  • ½ cup butter (clarified or ghee is even better)

Brine

  • 1 liter of water
  • 30 grams of Kosher salt
  • 5-6 cloves of garlic, smashed
  • 10 grams of brown sugar
  • 1 tablespoon of whole black pepper
  • 1 x bay leaf

Gravy

  • 6 cups chicken stock
  • 2T salted butter
  • ¼ cup AP flour
  • ½ cup dry white wine
  • Giblets and juices from the turkey

Wondering if you should wet brine or dry brine your Thanksgiving Turkey? The answer is… both!


This recipe will end dry, boring turkey. The outside is dry-brined for crispy, salty skin, and the inside is injected with a wet brine for juicy, perfectly seasoned meat.


This turkey is easy but requires some planning. If you are reading this on Thursday morning, you’ve already lost Thanksgiving! Okay, you haven’t lost; just don’t overcook the bird.


Here is a calendar to help you get organized:

  • Saturday: Remove your turkey from the freezer and place in the fridge.
  • Tuesday afternoon: Spatchcock and season the bird, make your turkey stock.
  • Wednesday: Drink Grill’n Time Cocktails.
  • Thursday: Get the turkey out of the fridge early and make some magic on that smoker.

Make the brine:

In a large pot, bring half of the water to a boil. Add the salt and sugar, stirring until they dissolve completely. Add the garlic cloves, peppercorns, and bay leaves to the hot water. Let it simmer for 5 minutes to infuse the flavors. Remove the pot from the heat, strain, and add the remaining water to cool the brine to room temperature. It is easiest to make this the day before.


Spatchcock the turkey:


Spatchcocking involves removing the backbone to flatten the bird, allowing for even faster cooking. 


To prep the turkey, remove the giblets, trim excess skin, pat it dry, and place it breast-side down on a stable cutting board. Save all the trim and parts for the stock! Cut along one side of the backbone using sharp kitchen shears from the tail to the neck. Repeat on the other side to remove the backbone entirely (save it for stock!). Flip the turkey over so it’s breast-side up. Press firmly on the breastbone until you hear a crack and the bird flattens. Tuck the wing tips under the breasts to prevent them from burning during cooking.


Season the turkey:


Move the turkey to a sheet pan with an inserted rack. Starting with the inside of the turkey facing up, liberally season with kosher salt and a nice thin sprinkling of pepper and garlic powder. DO NOT season under the skin for this recipe. Flip the bird skin-side up and repeat.


Using a meat injector, inject the meat with our brine. To do this, Insert the needle into the thickest parts of the turkey (breasts, thighs, and drumsticks). Press the plunger down slowly as you withdraw the needle to distribute the saline solution evenly within the muscle. Aim to inject 1-2 ounces of solution per pound of turkey, evenly spread across different areas.


The holes in the skin from the needle will help excess fat and steam escape from under the skin during cooking, making it crisp!


Put the turkey in the fridge, skin side up, for 24-36 hours.


Make the stock:


One advantage of prepping the turkey early is having ingredients for stock. Make this the day before! 


Rub the giblets, trimmed skin, and spine in olive oil and roast until light golden brown. Add them, along with the juices from the sheet tray, to a pot large enough to hold the stock and giblets. Add the stock and simmer until the stock has reduced slightly, about twenty minutes. Strain and allow it to cool. Store the story in the fridge.


Cook the turkey:


We are going to cook the turkey in two stages!


Preheat your smoker to 250º and remove your turkey 90 minutes before cooking. 


Place the herbs under the rack in the tray and place your turkey in the smoker, rotating the tray every 30 minutes until it reaches 153º – 155º in the breast and 165º in the thigh. The turkey will keep cooking. Poultry food safety is a factor of time and temperature. According to USDA, if the turkey gets to 155º intern for 47 seconds, it will be safe to eat. If you cook it to 165º on the smoker, it will hit 175º and be dry. If you have health concerns or love overcooked turkey, leave it on until the breast hits 165º and make extra gravy.


Allow the turkey to rest for 30-45 minutes (longer is okay; just tent it). Pour the pan juices into a bowl and reserve them for the gravy. 


Set up for searing the skin. We used our pizza oven at 600º, but you can also use a grill at 600º or a broiler with the turkey on a lower rack. Heat your butter and brush the skin. Place the turkey in the grill or oven until the skin gets golden brown, 3-5 minutes (watch it closely; turkey skin will go from golden to burnt and sad quickly).


It is ready to slice and serve!


Make the gravy:


Add the juice from the turkey sheet tray and the butter in a large skillet. Bring it to a simmer on medium-high heat. Reduce the heat and add the flour, cooking until it becomes light brown (2-3 minutes). Add the wine to deglaze the pan, then add the stock. Stir vigorously with a whisk to incorporate the rue and stock fully. Bring it to a simmer and stir until it thickens, about 3-5 minutes. Store in a thermos and keep it warm until you are ready to serve!

Comments:


Be The First To Comment:

Your email address will not be published. Required fields are marked *

Recipe Rating


Ninja Woodfire Thanksgiving

Author Mark & Fey
Keyword Ninja, Poultry, Thanksgiving, Turkey
Cook Time 1 hour 30 minutes
Servings 4

Ingredients

Sausage and Fennel Stuffed Turkey Breast

  • One 2 -2 1/2 pound skin-on turkey breast
  • 3 tablespoons Italian Juicy Bird Dry Brine Blend
  • 1 pound bulk sausage
  • 1 large bulb fennel thinly sliced into half moons

Mascarpone Smoked Sweet Potatoes

  • 4 large sweet potatoes washed and dried
  • 2 to 3 tablespoons olive oil
  • Kosher salt for seasoning
  • ¼ cup mascarpone cheese
  • 2 tablespoons maple sugar

Apple Hand Pies

  • 2 tablespoons salted butter
  • 3 large green apples peeled and diced
  • 2 small lemons juiced, divided
  • ½ cup light brown sugar
  • ½ cup granulated sugar
  • 2 teaspoons Apple Cinnamon Blend
  • 2 prepared rolled pie crust from one (15 ounces) package
  • 1 cup powdered sugar

Instructions

  • If your turkey breast is bone-in, set it skin side up to remove the breast meat from the bone. Use a filet knife to remove the ribs, slicing against the breast bone and down the ribs as closely as possible. Use the filet knife to make shallow slices into the breast meat in a cross-hatch pattern. Cover the breast with plastic wrap and pound with a meat mallet to about thick ¼ inch thickness. Remove the plastic wrap and season generously with the Italian Juicy Bird Dry Brine Blend on all sides. Dry brine the turkey breast on a cooling rack uncovered overnight.
  • The following day, heat a pellet smoker or grill to 325 degrees F. We’re using our Ninja Woodfire Outdoor Grill so we can grill, smoke and air fry this whole recipe. 
  • Heat a large skillet over medium heat. When the pan is hot, cook the sausage, breaking it into small pieces as you do, about 8 to 10 minutes total cook time. Remove the sausage from the pan. Add the fennel to the hot pan and cook until tender and caramelized, another 8 minutes. 
  • Cool the sausage and fennel and remove the turkey breast from the fridge. Make sure you’ve got butcher’s twine and scissors nearby. Turn the turkey so the skin side is down and layer on the sausage and fennel. 
  • Starting from a short end, roll the turkey into a log with the skin on the outside. Tuck in any loose bits. Secure the roll with kitchen twine. 
  • Rub the turkey all over with more Italian Juicy Bird Dry Brine Blend and vegetable oil and transfer to the smoker/grill at 325 degrees F until an instant read thermometer inserted into the thickest part of the turkey reads 145 degrees F, about 45 minutes to 1 hour. 
  • Poke the sweet potatoes all around with the end of a paring knife, drizzle with olive oil and season well with kosher salt. Add these to the grill with the turkey breast. Roast until they are super tender, about 35 minutes. 
  • Remove the turkey breast and potatoes from the grill. Rest the turkey for 10 minutes while finishing up the sweet potatoes. 
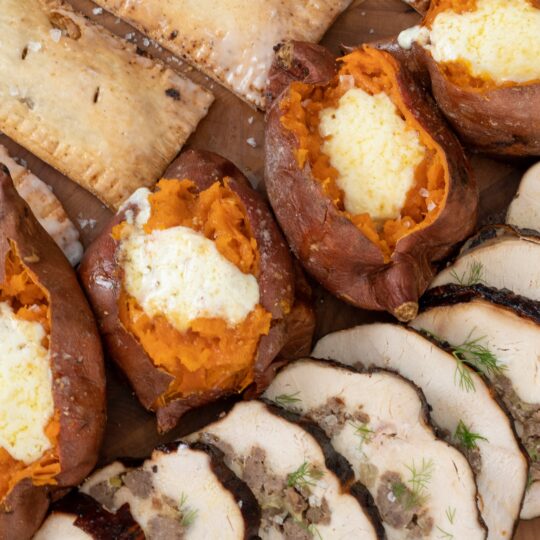
  • Slice open the sweet potatoes and let them cool for a few minutes before topping each with a spoonful of mascarpone and sprinkle with the maple sugar. 
  • Remove the twine from the turkey breast and slice the breast into ½ inch pieces for serving. Serve the potatoes alongside the turkey breast. 
  • For the apple hand pies:
  • Heat a large skillet over medium high heat. Add the butter, apples, and 2 teaspoons of the lemon juice and cook until they’ve just started to soften, about 5 minutes. Keep cooking but add in the sugars and Apple Cinnamon Blend. Cook the filling down until almost caramelized, about 5 more minutes. Remove from the heat to cool completely before building the hand pies.
  • Roll out the dough and cut each round into 4 rectangles, about 3 by 5 inches. You may need to trim the rounded top and bottom of the pie round to give you straight edges to work with. Fill 4 of the rectangles with about ⅓ cup of the filling. Brush the edges of the pie dough with water, top with another rectangle and press to seal. Use a fork to press the edges together further. 
  • Heat your air fryer to 380 degrees F. Cook the hand pies directly in the air fryer for 6 to 8 minutes until golden brown. Remove from the air fryer and cool for 5 minutes before icing. 
  • In a small bowl, whisk together the powdered sugar and remaining 2 teaspoons lemon juice until a thin icing forms. Brush the still warm hand pies with the icing. Let the icing set for 2 minutes before enjoying.